If you have an upcoming sponsorship or want to highlight important announcements during your live streams, the Streamlabs Sponsor Banner widget is an easy way to rotate visuals like logos, CTAs, event graphics, and more.
This widget allows you to upload your own images, customize how they appear, and automatically rotate between them-no manual switching required. It's a simple, professional way to keep your branding consistent and give visibility to partners or promotions that support your stream.
In this blog, we'll walk you through customizing the widget and adding it to Streamlabs Desktop, OBS Studio, or another live streaming software.
Jump Ahead:
- How to Customize Streamlabs Sponsor Banner
- How to Add Sponsor Banner in Streamlabs Desktop
- How to Add Sponsor Banner in OBS Studio
- How to Add Sponsor Banner in XSplit/Other Streaming Software
How to Customize Streamlabs Sponsor Banner
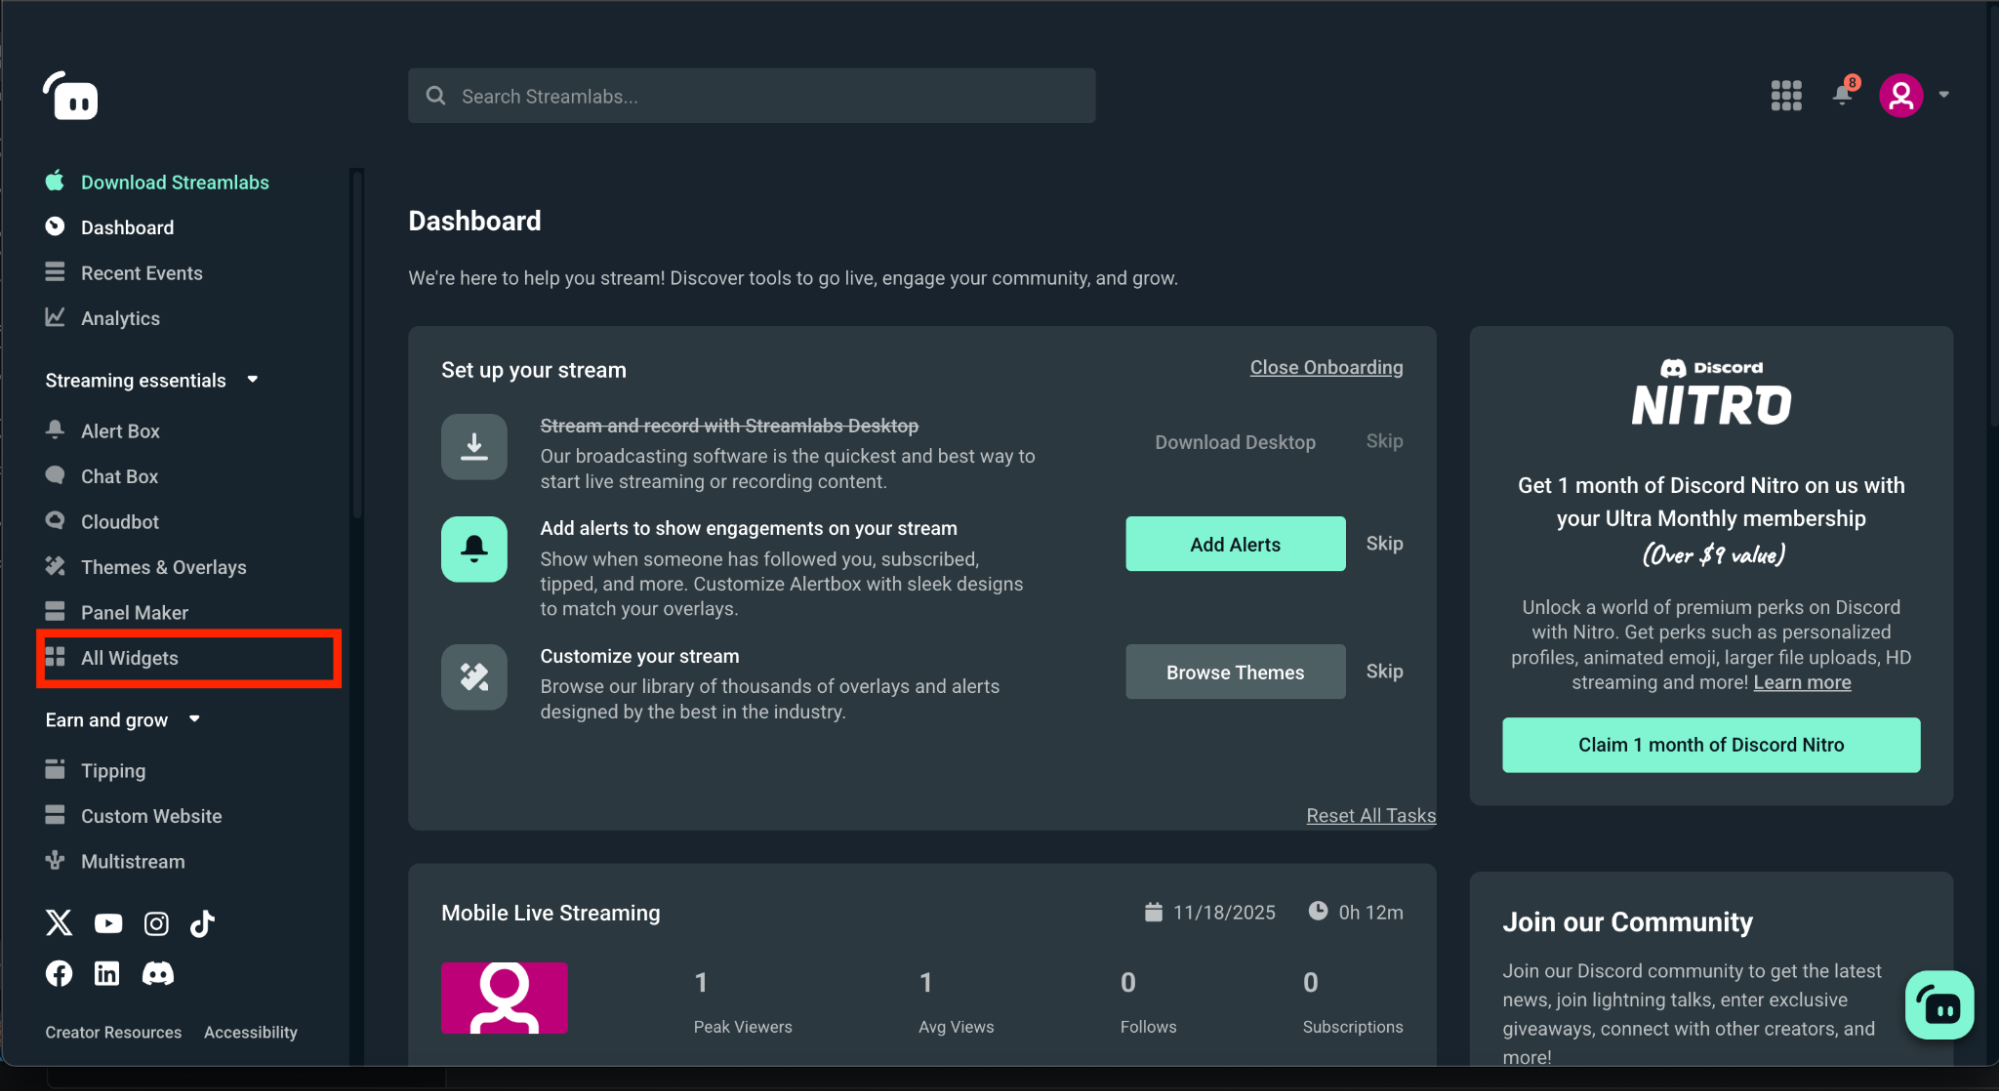
Step 1: Head over to your Sponsor Banner settings on your Streamlabs.com Dashboard. You can find it by navigating to All Widgets and selecting Sponsor Banner or searching for it in the search bar.

Step 2: From your web browser, you can adjust a variety of settings for your Sponsor Banner, including:
- Widget Hide Duration—how long the banner stays hidden before displaying again.
- Widget Show Duration—how long each banner remains visible before rotating.
- Banner Width—adjust the horizontal width of the banner in pixels.
- Banner Height—adjust the vertical height of the banner in pixels.
- Image Animation—choose how each image enters (e.g., Bounce In).
- Background Color—keep it transparent or add a background color as needed.
- Placement—choose between Single (one banner rotating at a time) or Double.
- Placement 1 Images—upload your sponsor or promotional images.
- Image Duration—set how long each uploaded image stays on screen before switching.
- Add Image—upload additional images to rotate through the banner.
- Enable Custom HTML/CSS—turn on if you want to use custom code for advanced styling.
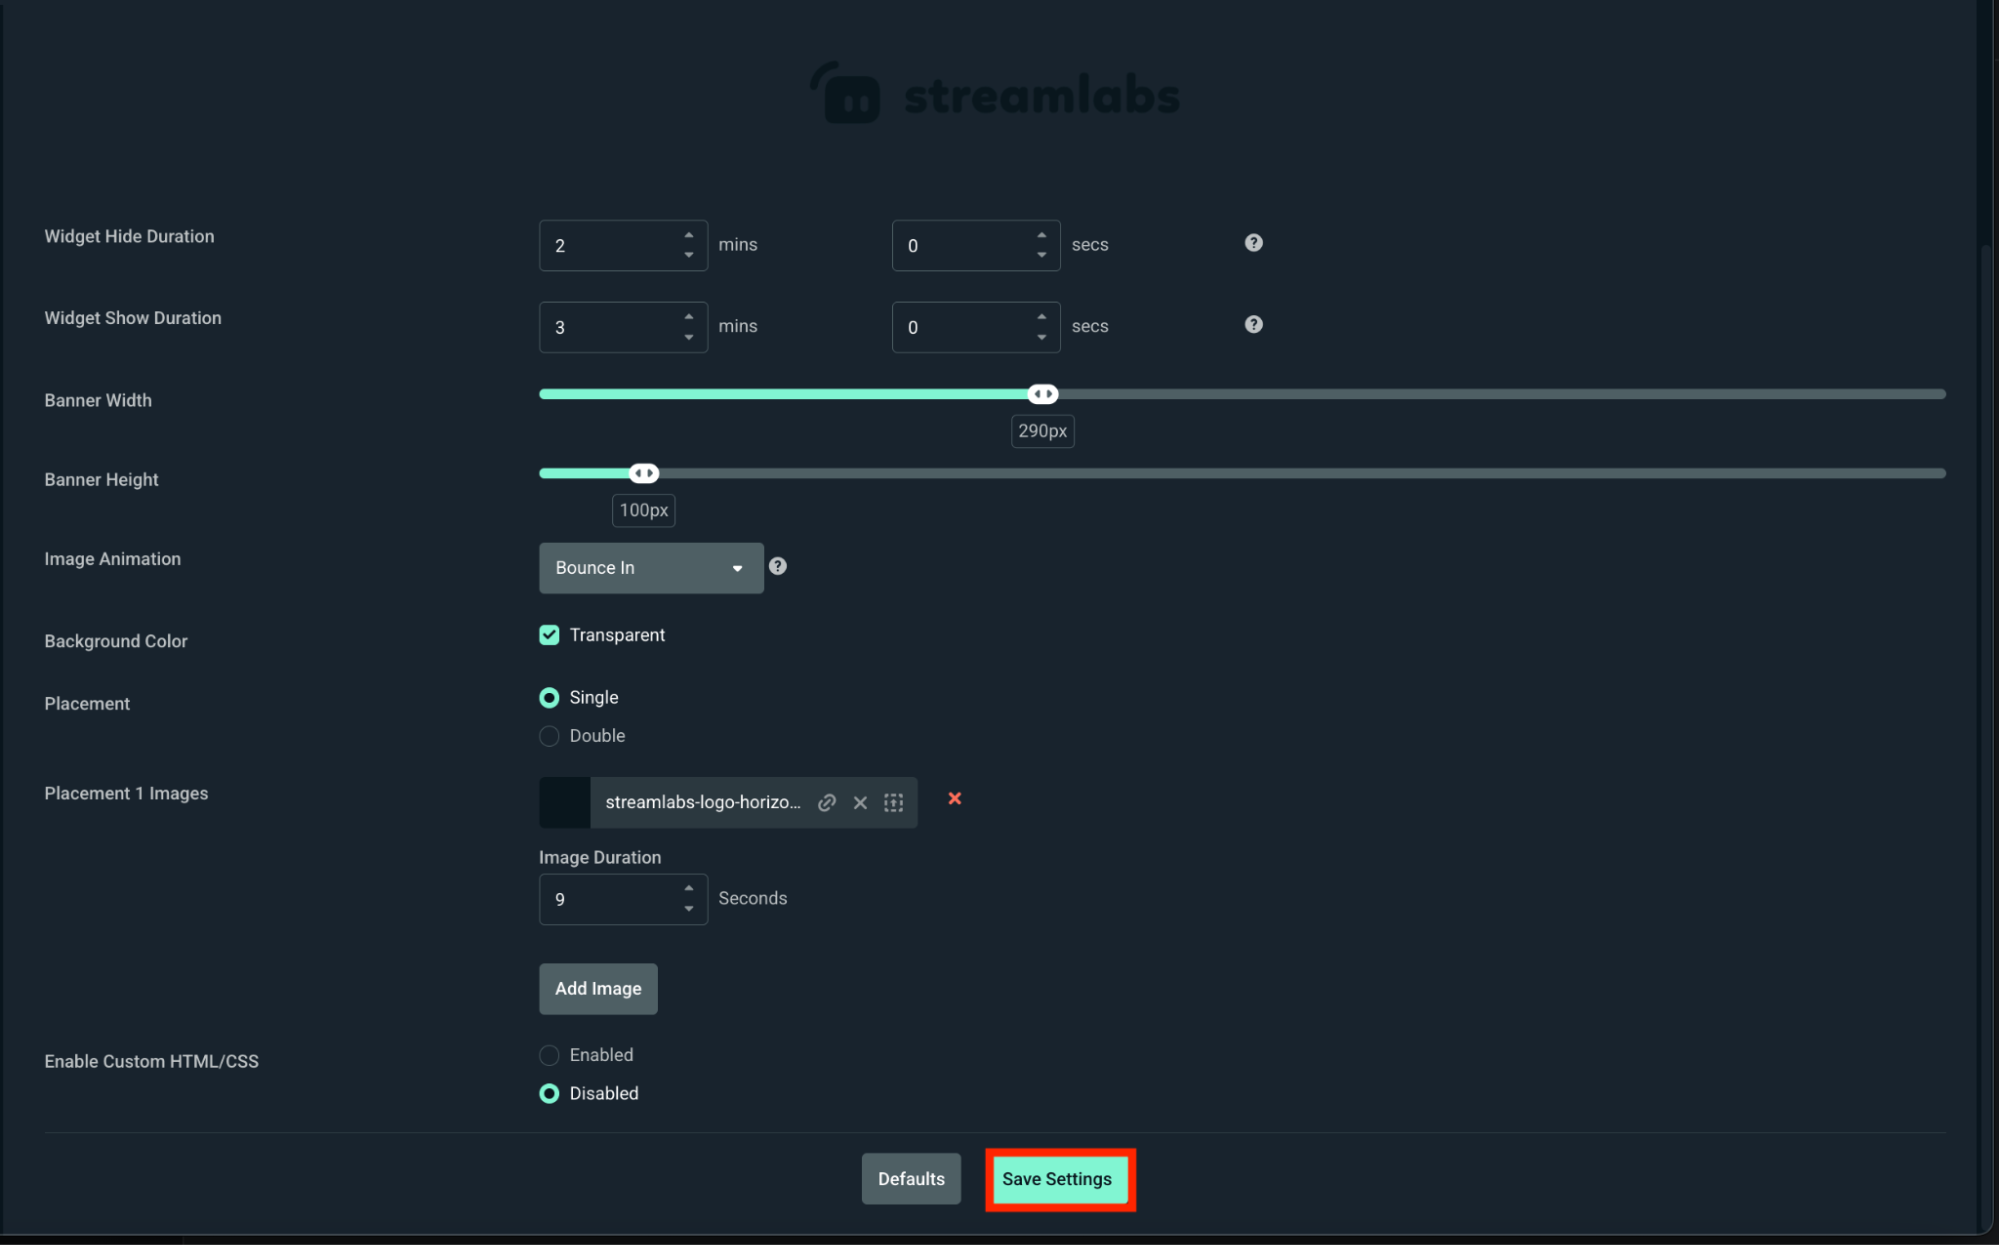
Be sure to click Save Settings when you're done customizing your widget or hit Defaults if you wish to revert to the default settings.
How to Add Sponsor Banner in Streamlabs Desktop
Step 1: Open Streamlabs Desktop and navigate to the Sources panel at the bottom of your screen.
Step 2: Click the + icon to add a new source, then choose Sponsor Banner from the list of available widgets.
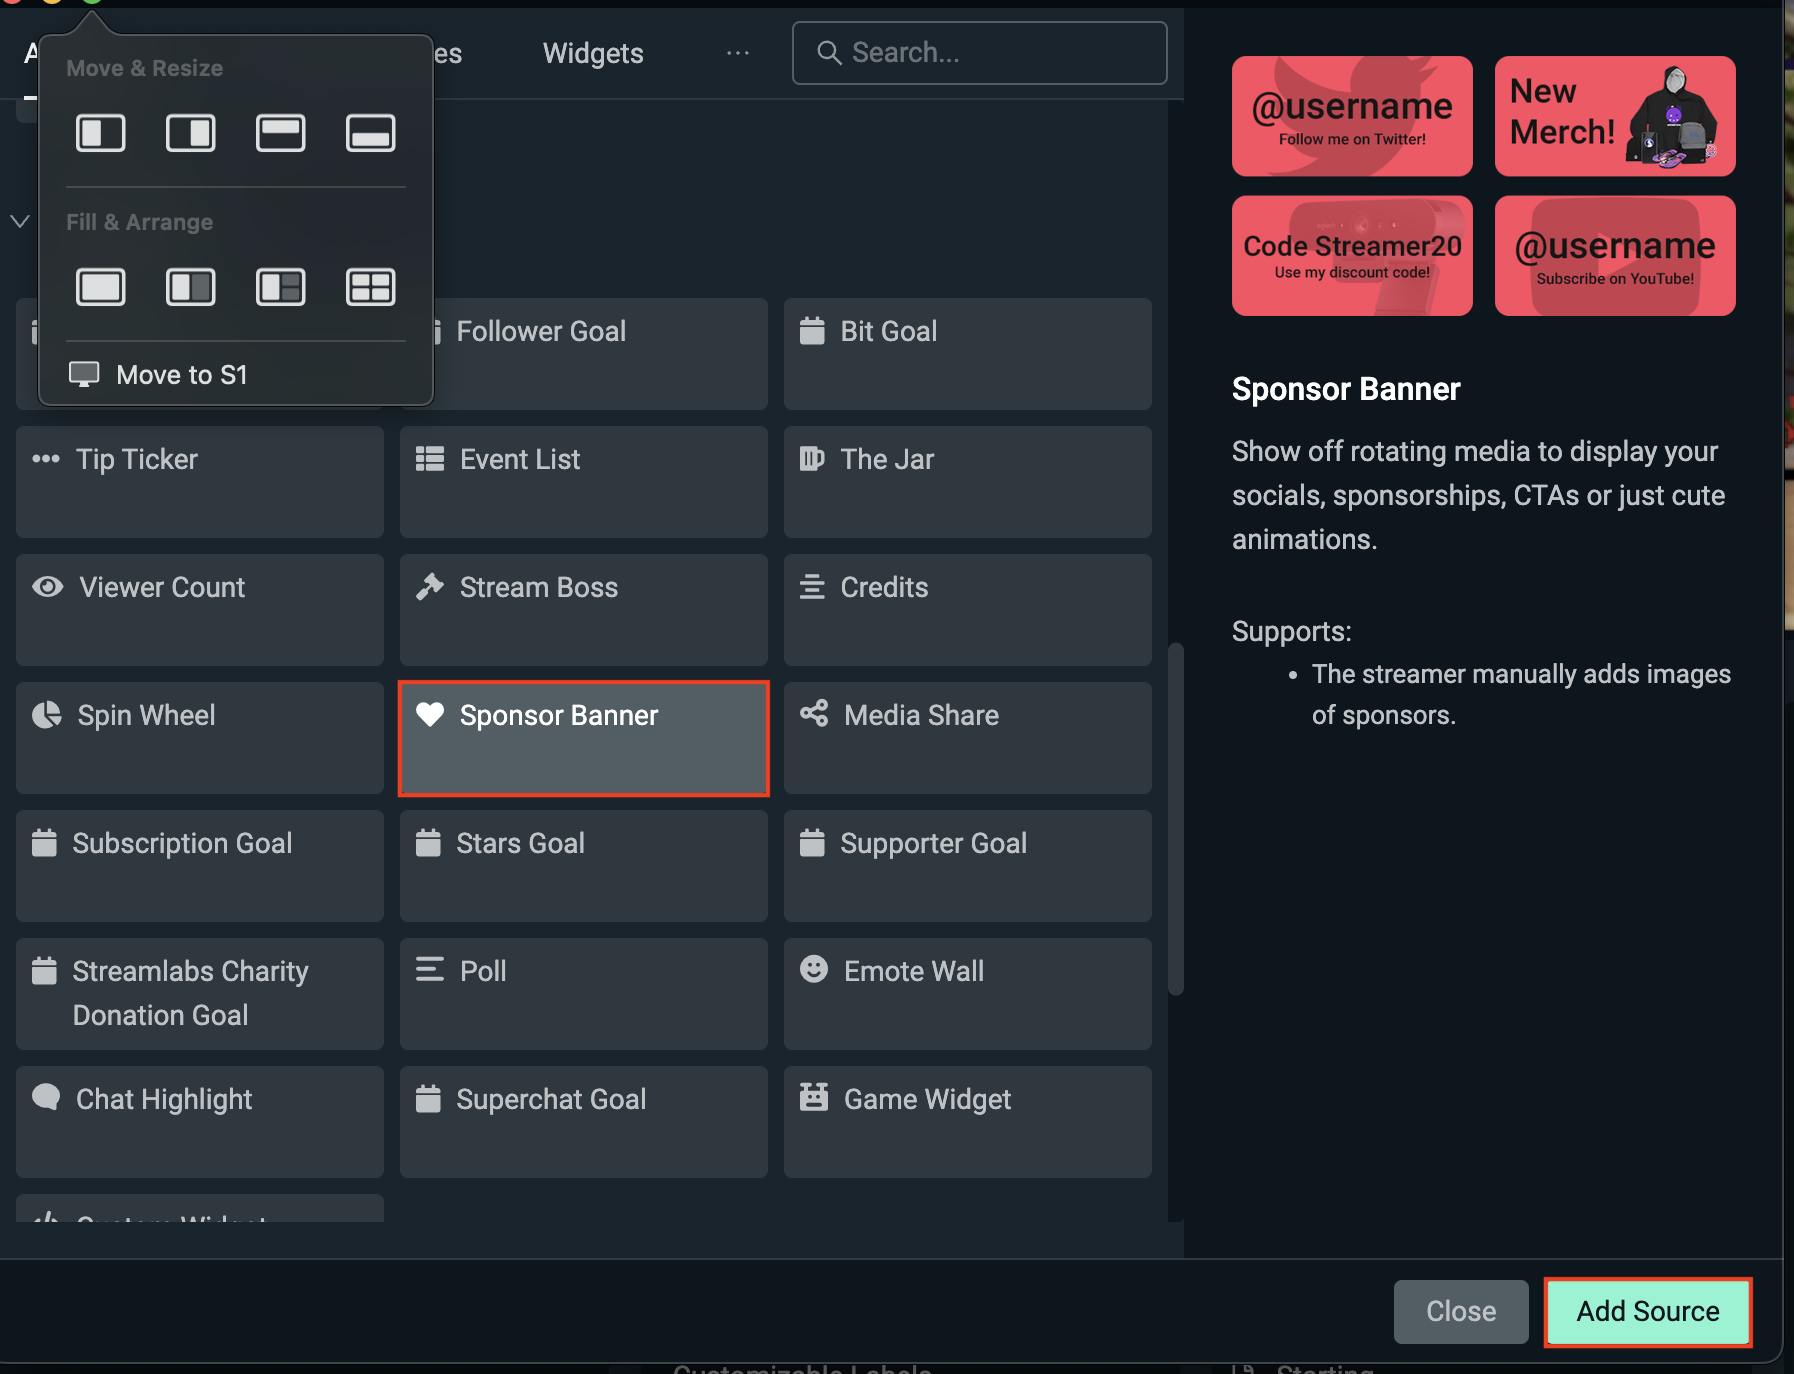
Step 3: Next, name your Sponsor Banner source, then click Add Source.

Step 4: You should see a preview window, plus settings for your Sponsor Banner widget. Here, you can adjust things like placement, image sets, hide/show duration, and more just as you would from your Streamlabs.com Dashboard.

How to Add Sponsor Banner in OBS Studio
If you're using OBS Studio with the Streamlabs Plugin, you can add theSponsor Banners widget just as easily.
Step 1: Open OBS Studio and make sure the Streamlabs Plugin for OBS is installed and you're logged in.
Step 2: In the top navigation panel, click the Streamlabs. This will take you to all settings for the Streamlabs for OBS plugin.


Step 3: From the widget list, select Sponsor Banners, then click + Add. If you need to set up or make changes to the widget, click Settings to go to your Streamlabs Dashboard.
Step 4: The Sponsor Banner widget should now show under Sources in OBS Studio. Resize and move the credits widget like any other source.
Now that your Sponsor Banners widget is set up and styled, you're ready to roll the final scene of your stream. It's a small but powerful way to spotlight your community's support and leave them with a warm thank-you.
How to Add Sponsor Banner XSplit/Other Streaming Software
If you're using a streaming software outside of Streamlabs Desktop or OBS such as XSplit, you can still use the Spin Wheel widget. Here's how.
Step 1: Head to your Spin Wheel settings on your Streamlabs.com Dashboard and copy the unique widget URL at the top of the page.
Step 2: Open XSplit, or your preferred streaming software and add a Browser Source by clicking the + button in the Source panel, then select Browser Source (or the equivalent).
Step 3: Paste your Spin Wheel widget URL into the URL field, set your desired width and height, then click OK. Resize and place the browser source in your canvas. Your Spin Wheel will now display automatically during your stream.
Note: To make changes to your Spin Wheel outside of Streamlabs Desktop you must use your Streamlabs web dashboard.
The Sponsor Banner widget is a simple way to highlight sponsors, announcements, and more with personal branding-add one today to elevate your stream and give supporters, important announcements, etc. the visibility they deserve.
0 Comments