Do you want to record a video of your screen on a Mac to share on social media? Or perhaps you’re a company looking to record a tutorial? With Streamlabs Desktop, you can create HD quality video recordings right on your Mac for free.
Learn more about using Streamlabs Desktop to record your screen by visiting our website.
Getting Started
First, you’ll want to visit our website to download our free broadcasting and recording software, Streamlabs Desktop. While you are there, it is a good idea to log in to the dashboard. The Streamlabs dashboard is your command center. From here you customize your alerts, browse thousands of stream overlays, customize your widgets, add chatbot commands, and much more.
After you have downloaded Streamlabs Desktop, the onboarding process will provide you with the essential components you’ll need to start streaming right away.
Capturing Desktop Audio in Streamlabs Desktop for Mac
With the release of Streamlabs Desktop for Mac, a common question is “Why can’t I capture desktop audio?”. Unlike Windows, macOS does not have any system-level audio routing. This means that individual apps can’t access audio signals from other apps out of the box. However, there are third-party solutions that can accomplish this.
As of macOS 11 Big Sur, we recommend BlackHole by Existential Audio. This guide will cover how to install and set up BlackHole for use with Streamlabs Desktop.
Step 1: Download and Install BlackHole.
Click here for BlackHole’s Github page, where you can find instructions on how to download the installer. Once you have the .pkg file downloaded, open it and you should see this:
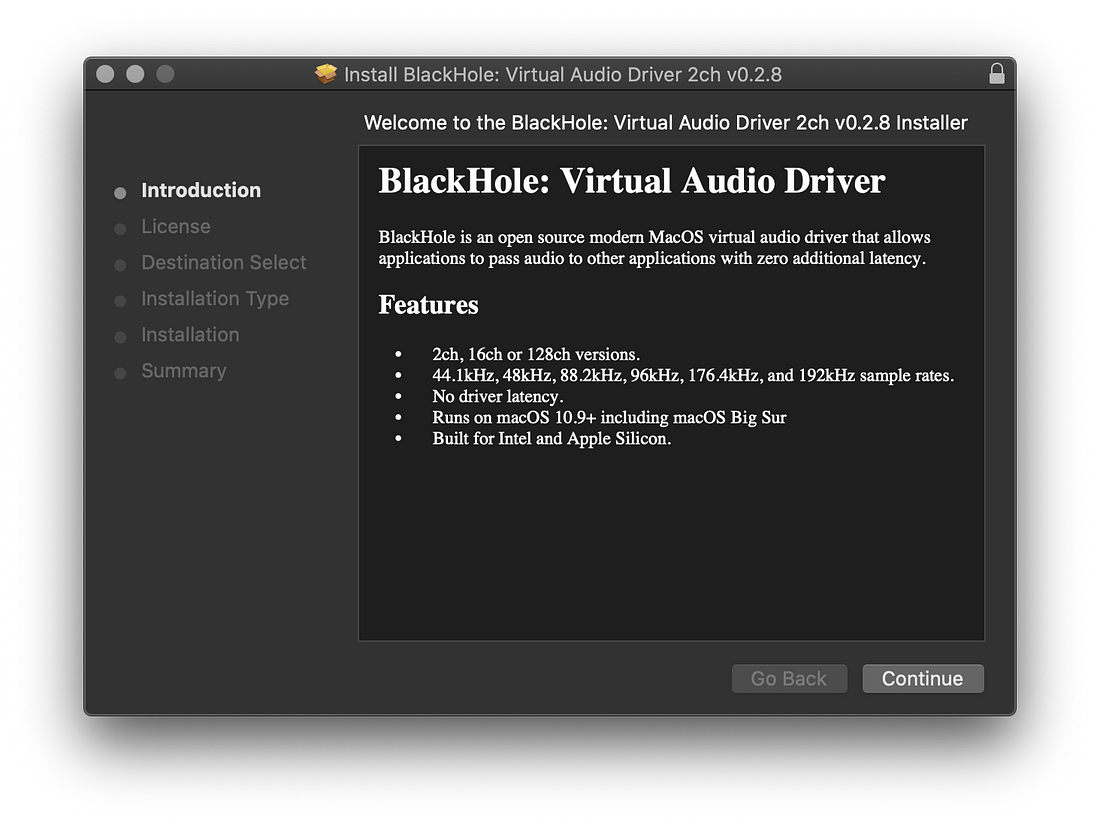
Follow the instructions to finish installing, entering your password when prompted.
Step 2: Setting up a Multi-Output device.
There are several different ways to utilize the features that BlackHole offers, however for the scope of this article and Streamlabs Desktop, in particular, we’ll only cover setting up a Multi-Output device so that you can capture and monitor desktop audio.
- Open the “Audio MIDI Setup” utility
- Click the Plus (+) button in the bottom left corner and click Create Multi-Output Device

Step 3: Select Devices for Monitoring
Check the box next to BlackHole, the Built-in Output, and any other devices you want to use for monitoring. Important: the built-in output needs to be ABOVE BlackHole in the list. If it’s not, uncheck and re-check the box under “Use” to alter the order.

Step 4: Set Default Sound Output
Right-click on the Multi-Output Device and select “Use This Device For Sound Output”. Now it’s set as your default output device! All desktop audio will now be output to both your built-in device as well as the virtual BlackHole device.
Now open Streamlabs Desktop and make sure that BlackHole is selected as one of your Mic/Auxiliary devices in Settings > Audio.

You’re done!
Video Settings
Now, let’s get into the video settings you should adjust to get the best quality picture.
Navigate to the video settings by clicking on the settings cog in the lower left-hand corner of Streamlabs Desktop and clicking on “video”.
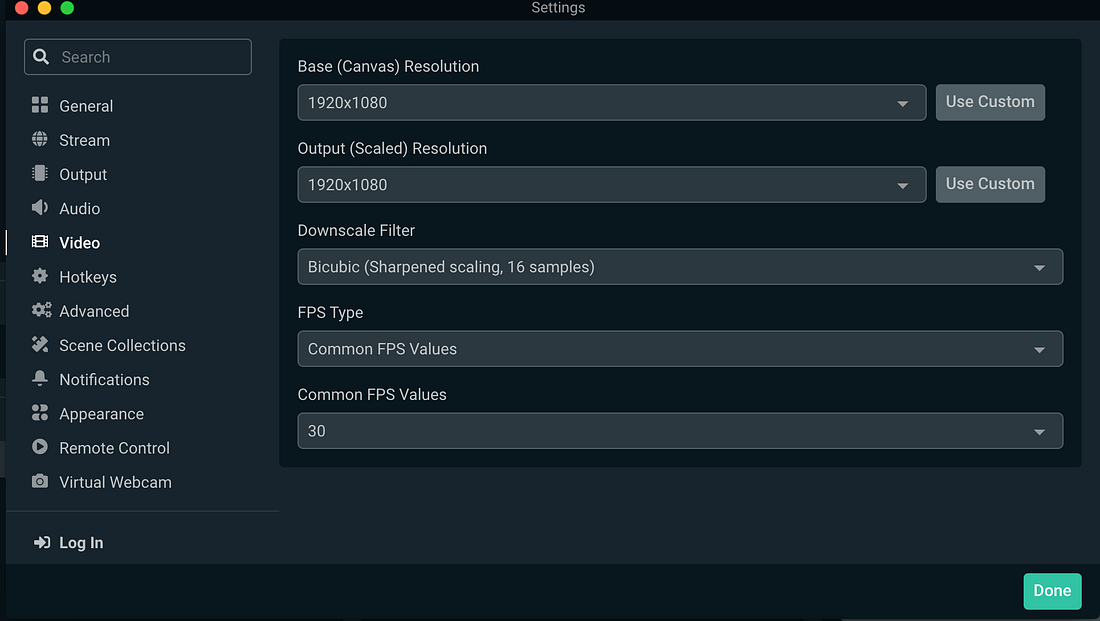
Base (Canvas) Resolution
For recording gameplay, it is recommended that your base resolution match your monitor’s resolution. In the case above, it is 1920x1080.
Output (Scaled) Resolution
For recording gameplay, it is recommended you choose the highest quality output resolution. In my case, it is 1920x1080.
It is recommended that you monitor the performance of your computer while you record. If you notice that your computer is struggling, try lowering the output resolution.
Downscale Filter
It is recommended to choose Lanczos as your downscale filter, as this provides the best quality at the cost of slightly more CPU.
FPS
We recommend recording in 60 FPS in most cases, especially for gameplay that involves a lot of action. If you are playing a board game or something with a more static image, you can probably get away with 30 FPS, but in general, try to record more frames if you can.
Output Settings
To adjust the output settings for your recording, by clicking on the settings cog in the lower left-hand corner of Streamlabs Desktop and clicking on “output”. Make sure you switch to “Advanced” to access all of the settings.
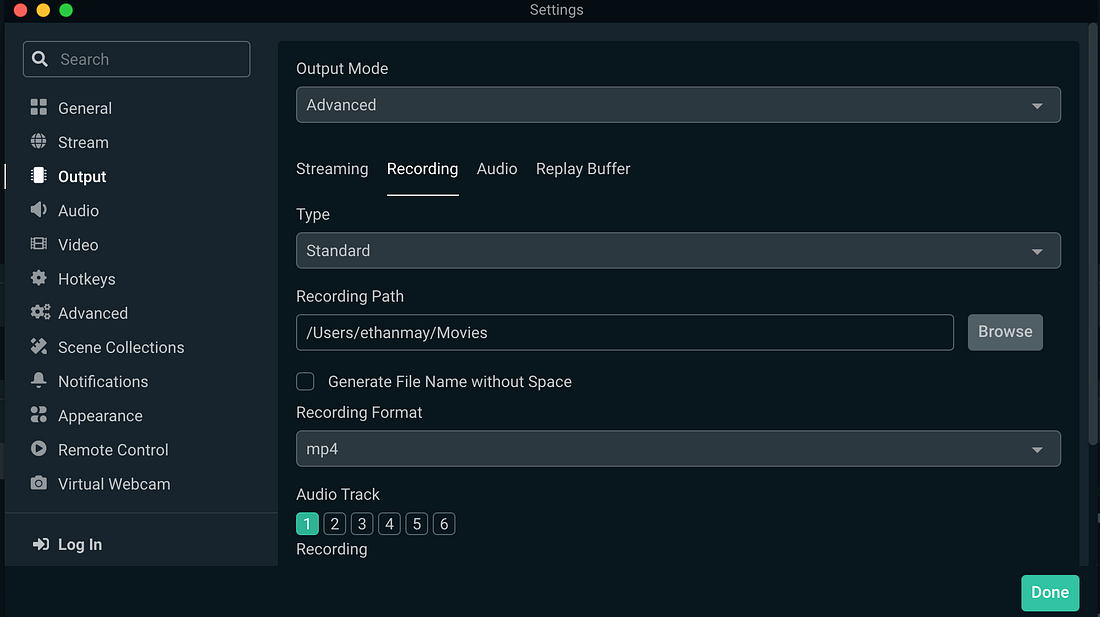
Recording Path
Pick the destination you’d like your recording to appear.
Recording Format
In most cases, we recommend recording in the mp4 format.
Recording Encoder
When it comes to encoders, Mac has three kinds: x264, Apple VT H264 Software Encoder, and Apple VT H264 Hardware Encoder. In most cases, we recommend x264.
Rate Control
We recommend choosing CBR
Bitrate:We recommend choosing a bitrate any from 35000 to 40000, but experiment here to find out what best suits your needs
Keyframe Interval
You canleave this setting as 0.
CPU Usage Preset
We recommend choosing “Very Fast” for the best mix between performance and quiality.
Profile
You can leave this setting on “high”.
You can leave the rest of the settings in this section on their default states as they won’t have much impact on quality.
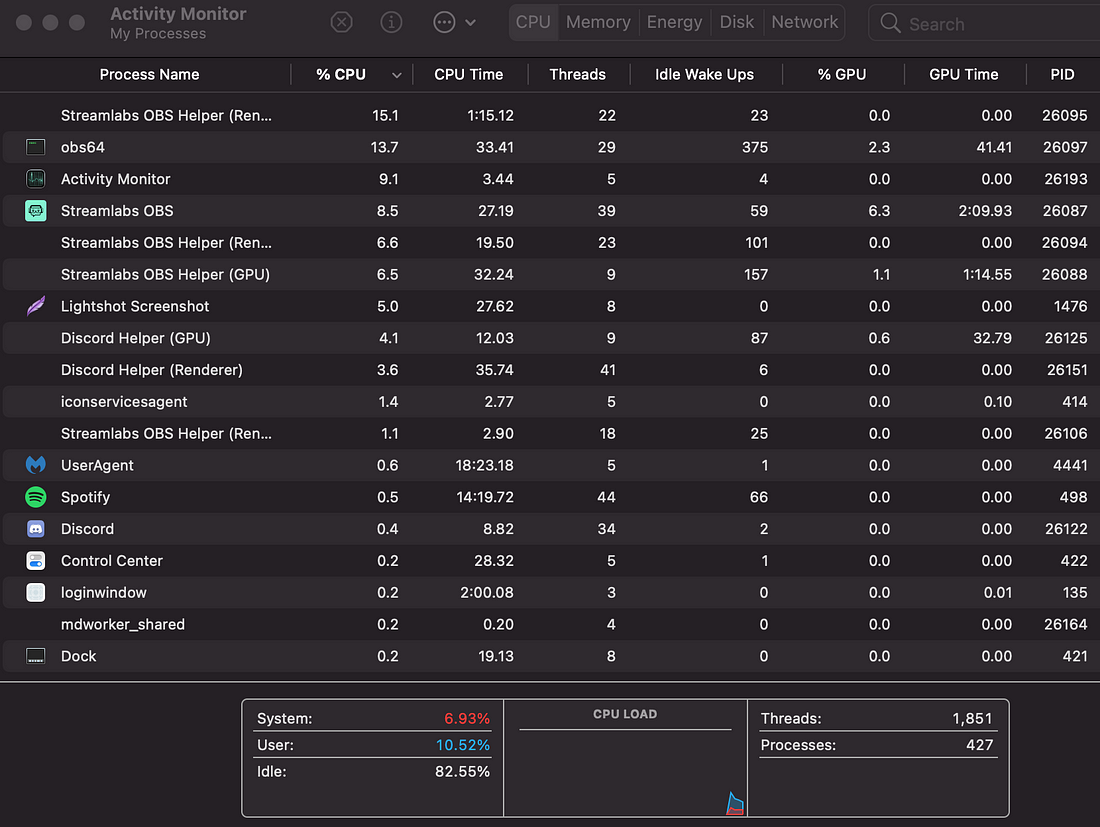
Test your Settings
Now that you’ve adjusted the video and recording output settings to optimize for quality, you show now test to make sure your Mac can handle the performance increases. Open the activity manager as seen in my screenshot. You can find this by clicking the magnifying glass at the top right of your mac and searching “Activity Manager”. Try recording gameplay with Streamlabs Desktop and monitor the performance on this screen. If your CPU usage is too high try adjusting the settings outlined above to optimize for your computer.
And that wraps up the settings you can adjust to get the best quality recording in Streamlabs Desktop.
If you have any questions or comments, please let us know. Remember to follow us on Twitter, Facebook, Instagram, and YouTube.
You can download Streamlabs Desktop here.
0 Comments