One of our most popular features for Streamlabs Cloudbot is the media share functionality. Typically, the Media Share widget works by allowing viewers to request a video when sending a tip.
However, with Cloudbot, your viewers can also request a video in your chat without the need to send any monetary support. If you're looking for a fun way to get your entire chat to engage in your stream, this is a great tool to use.
Jump Ahead:
- How to Enable Media Sharing in the Dashboard
- How to Add Media Share Via Cloudbot
- How to Manage Your Media
- Granting Permissions to Moderators via Shared Access
- How to Add Media Share Widget to Streamlabs Desktop
- How to Add Media Share Widget to OBS Studio/XSplit/Other Software
Note: Currently, the Media Share widget only supports links from public YouTube videos.
How to Enable Media Sharing in the Streamlabs Dashboard
Step 1: Visit Streamlabs.com and log into the Dashboard.
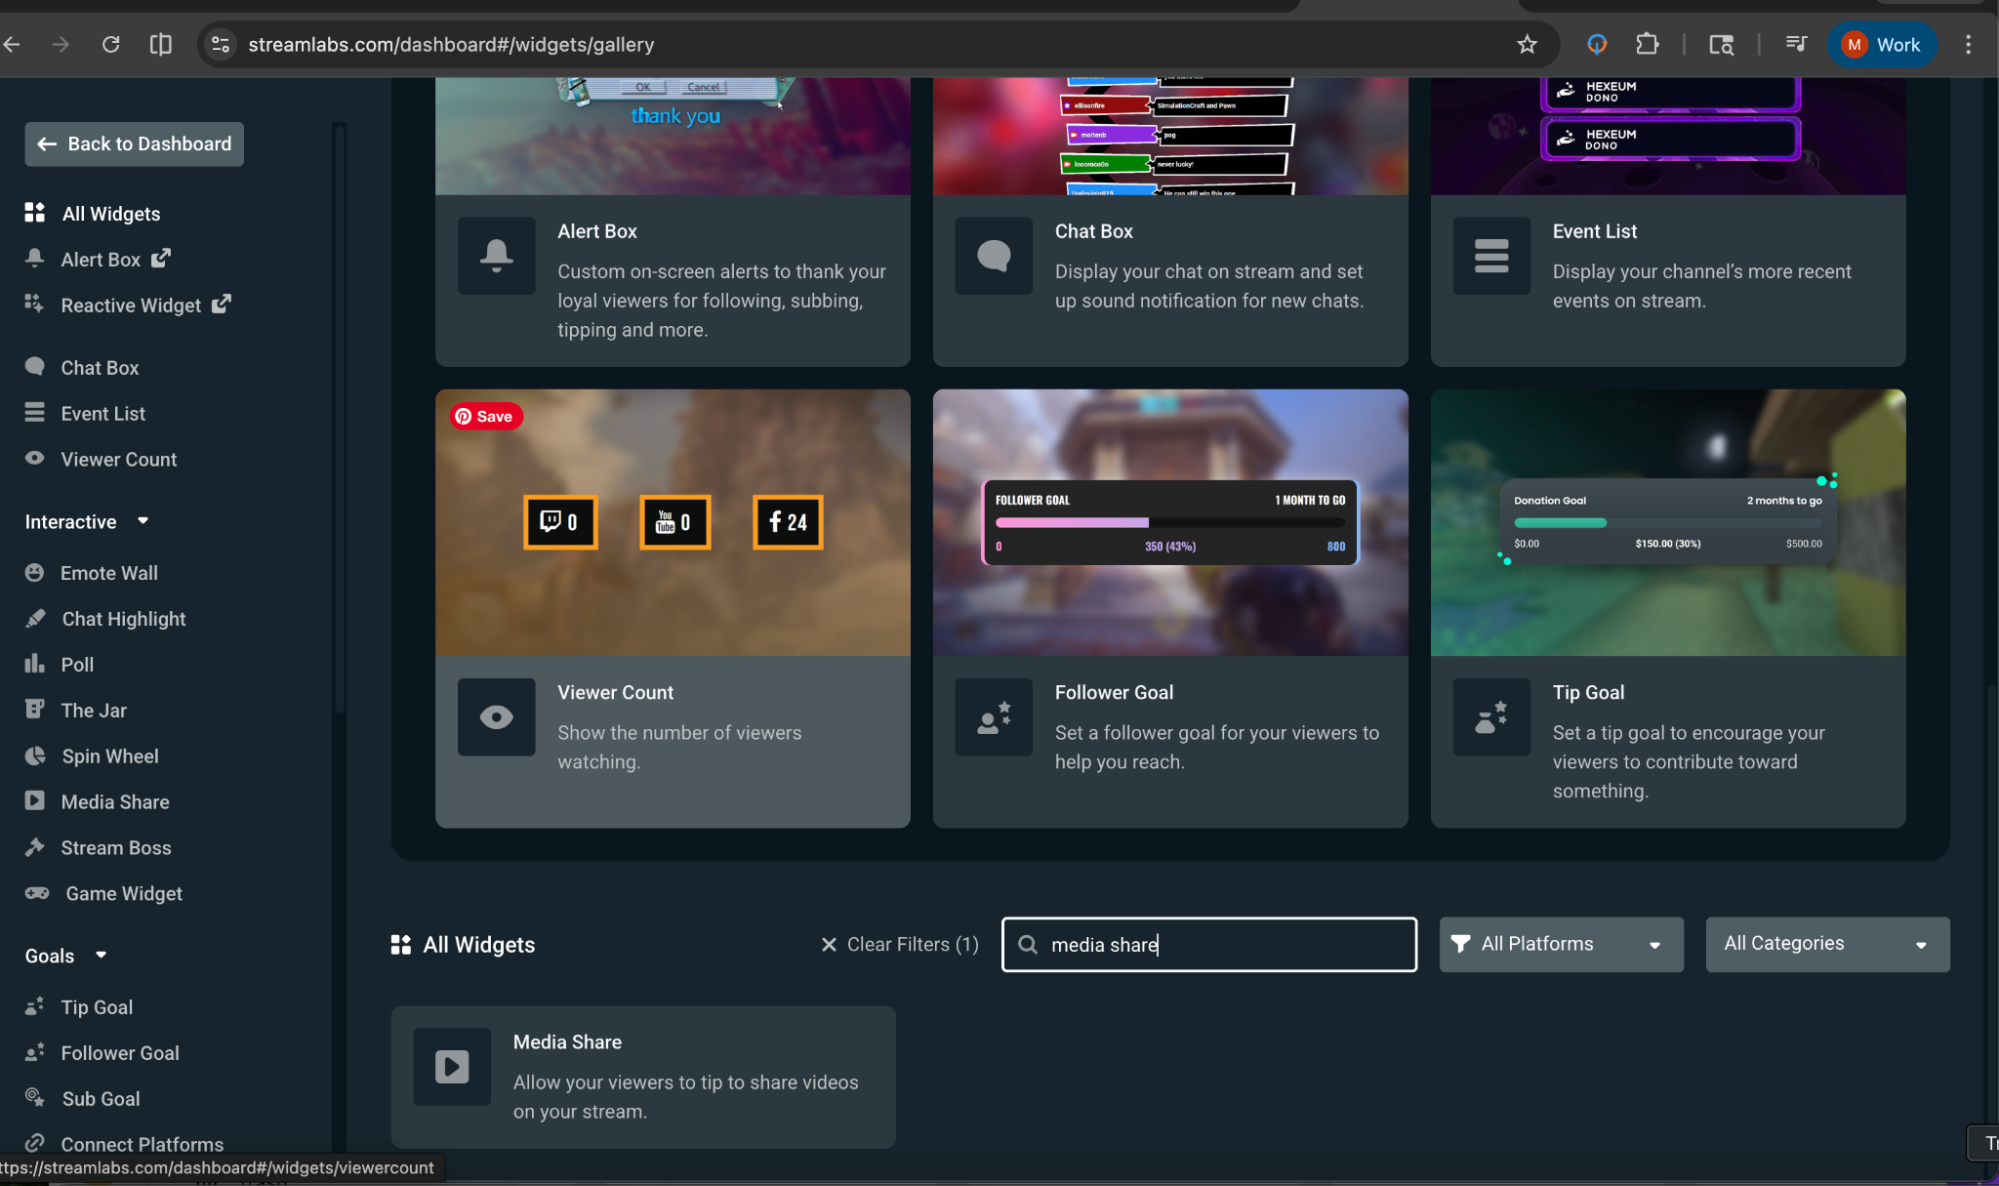
Step 2: On the left side of the Dashboard, click on All Widgets.
Step 3: Click on (or search) Media Share.
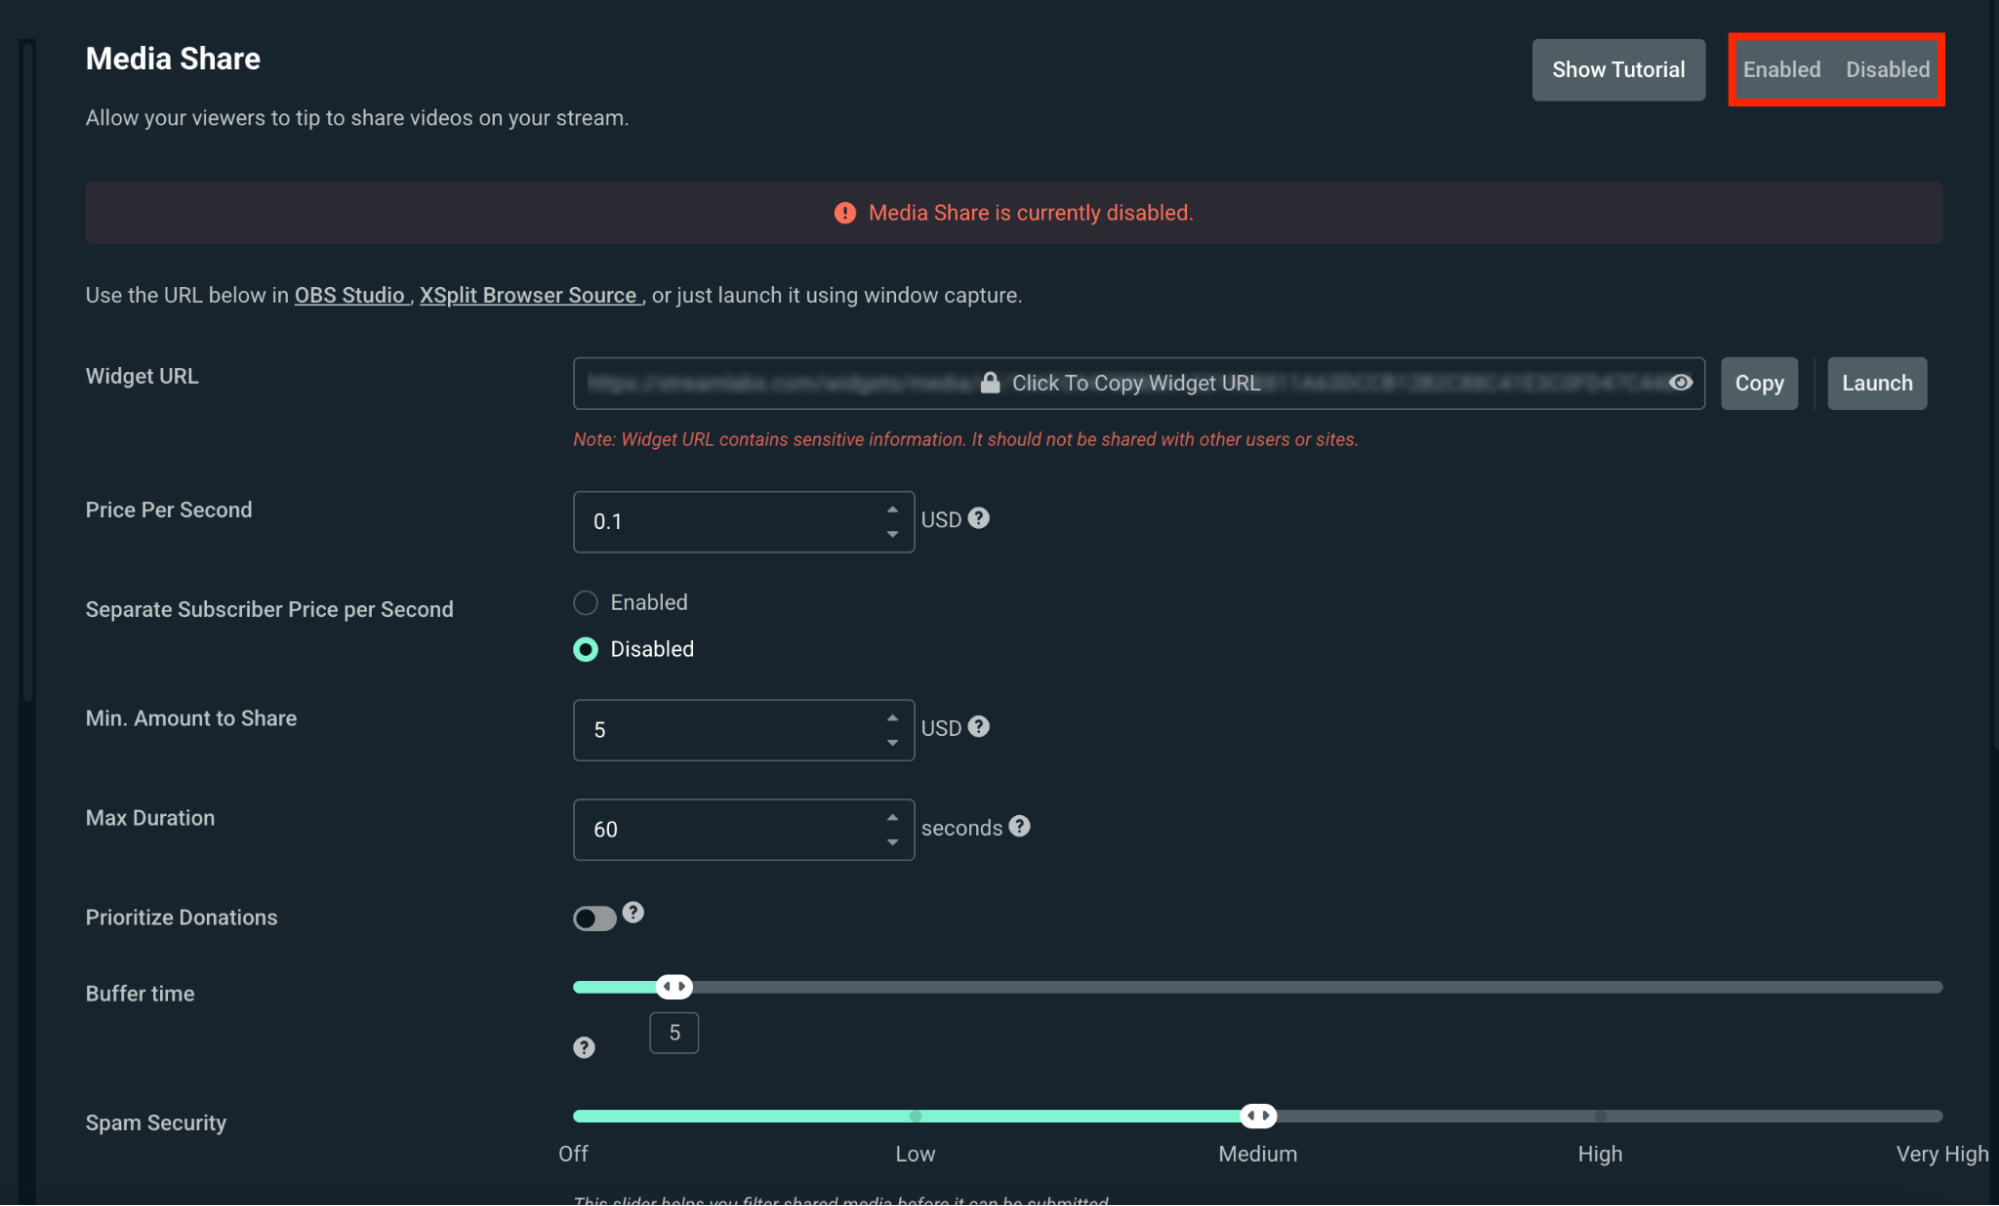
Step 4: This will take you to the Media Share settings page. Click Enable on the top right of the page.
Step 5: After enabling Media Share, a popup will ask you to choose between auto-show videos or auto-hide videos.
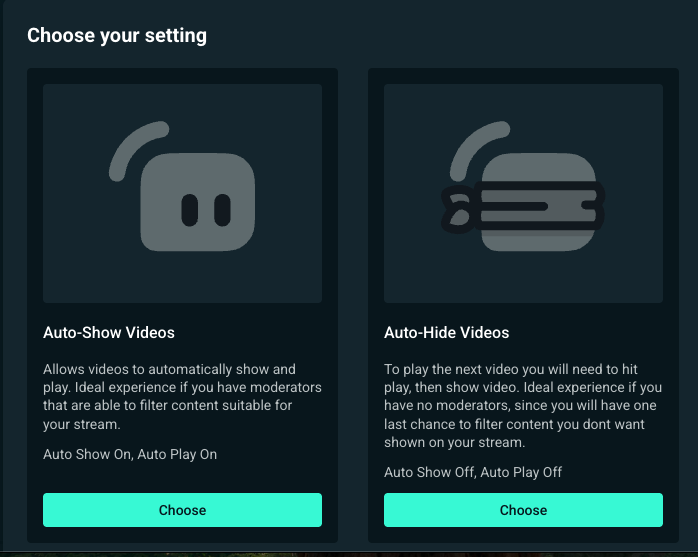
Auto-show is great for streamers with moderators that can filter the content before it's shown live.
Auto-hide is great for streamers who don't have moderators or want to play media manually. You can change this setting later from the Recent Events tab, where you will manage all of the media sent to you.
Choose Your Preferences
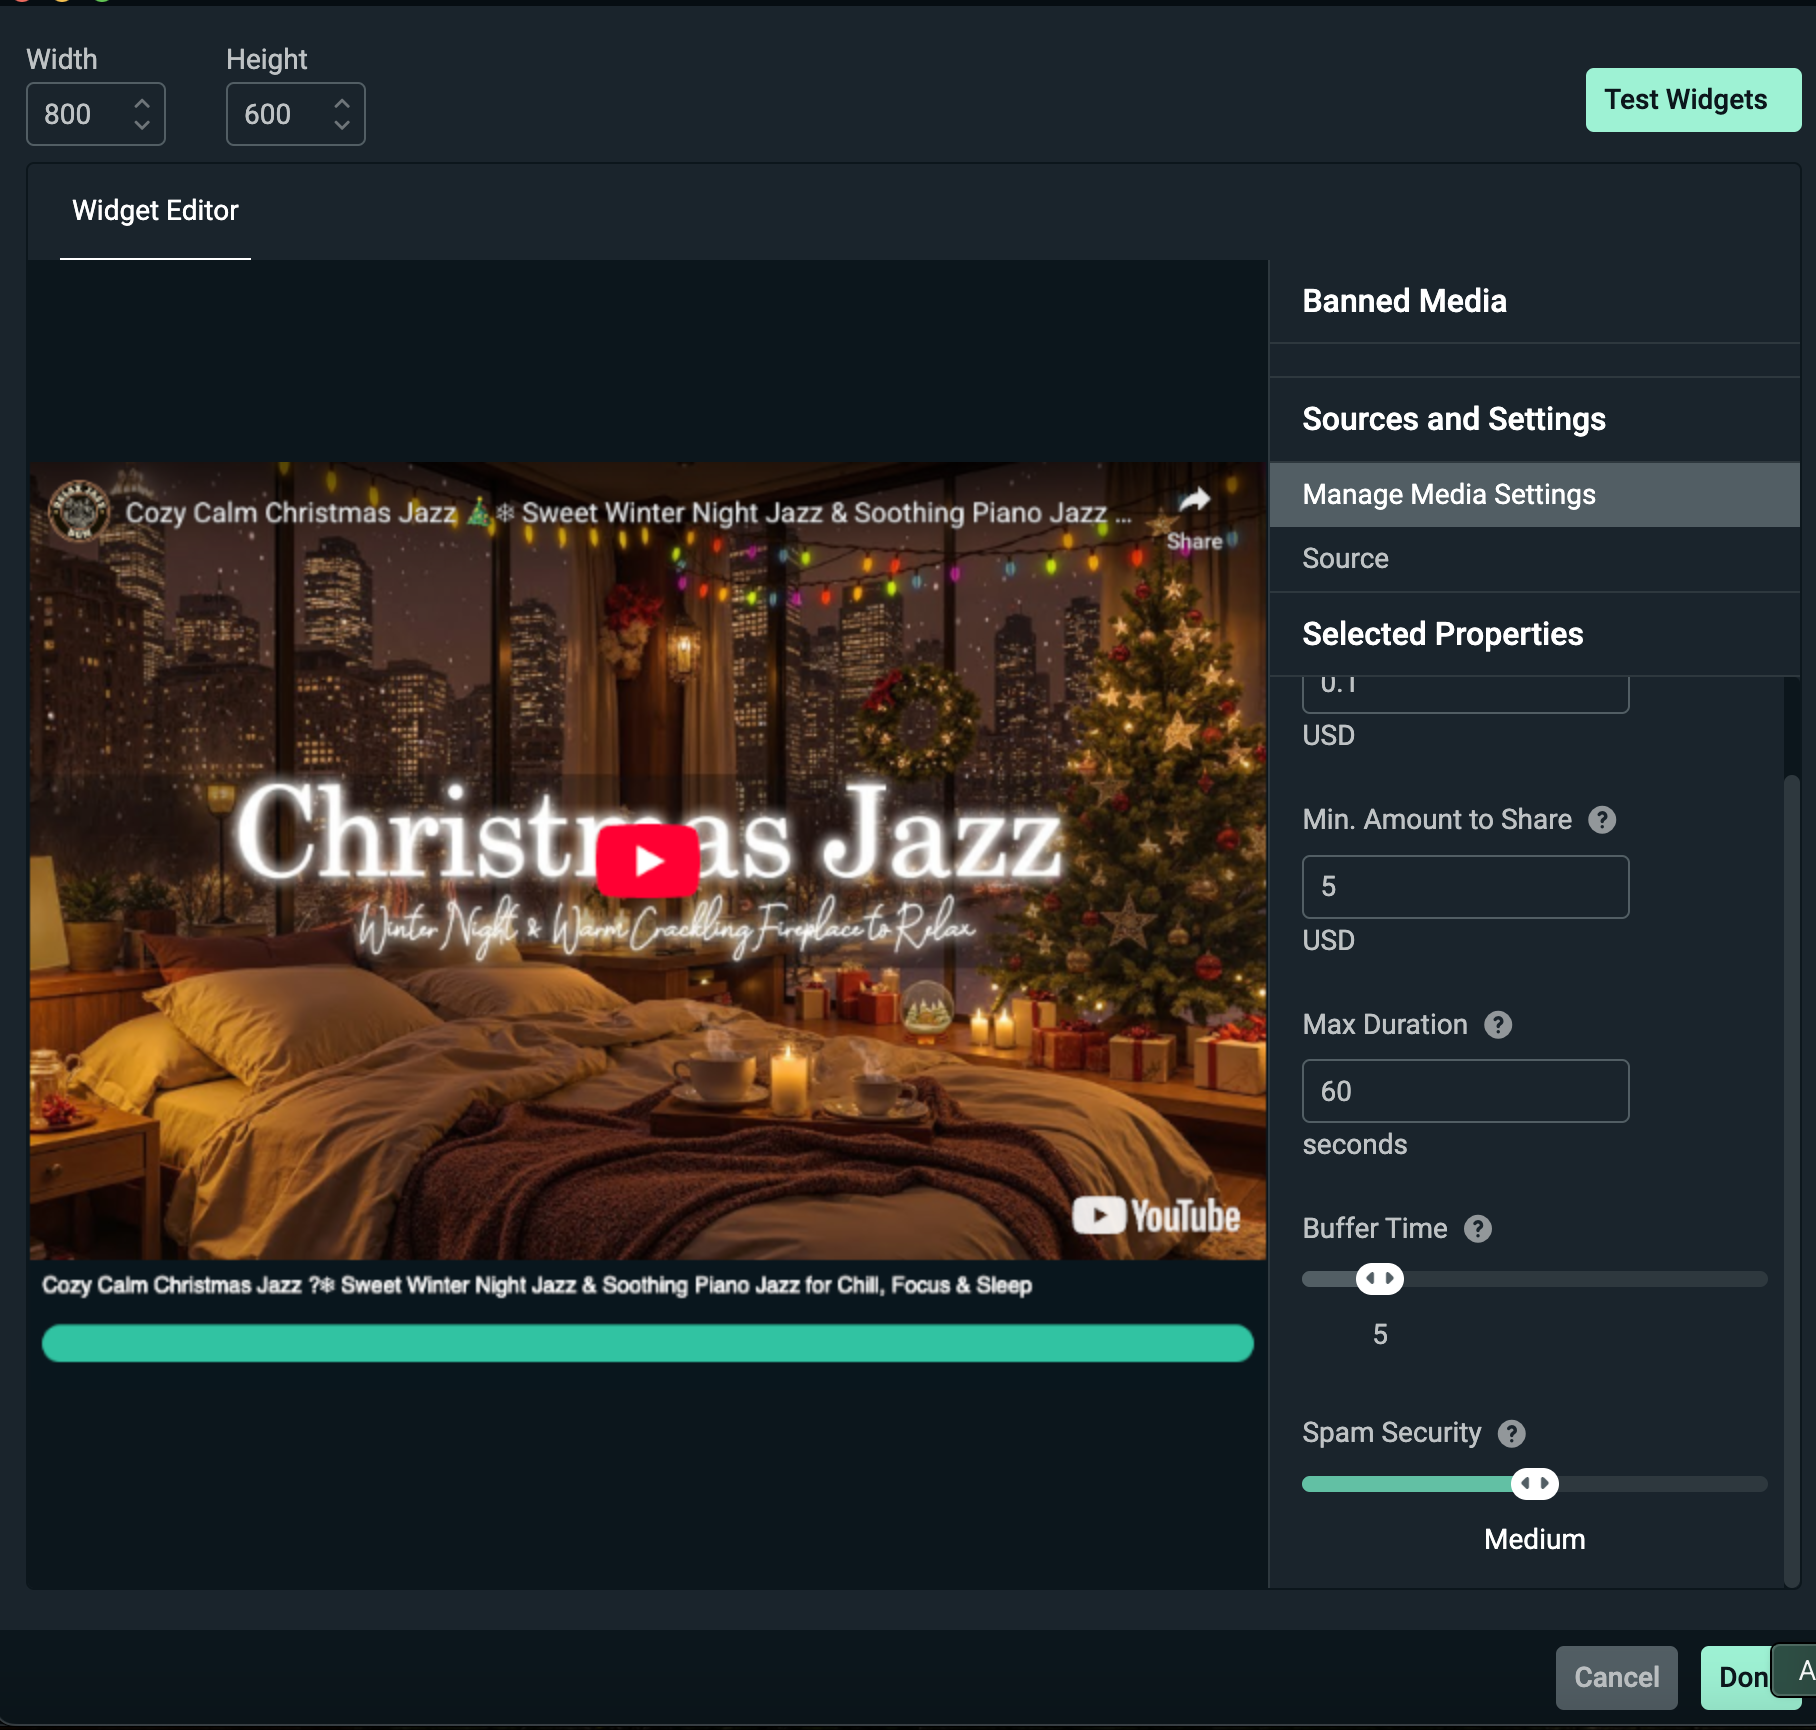
Step 6: In the Media Share section on your dashboard, you can adjust the following settings.
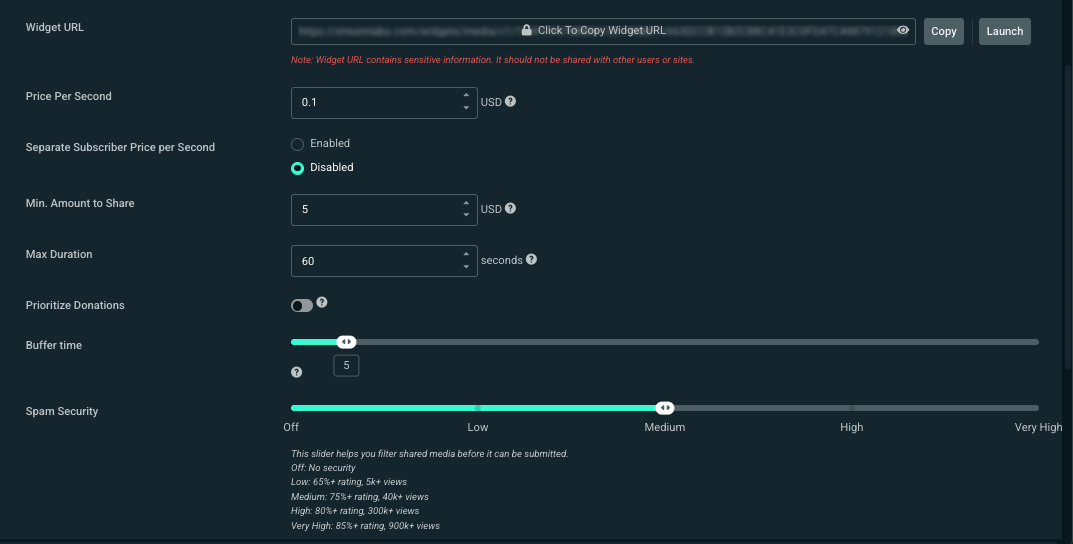
- Price per second—this defaults to ten cents. One second of the submitted content will play for every ten cents tipped to you.
- Separate Subscriber Price Per Second—lower the price per second for your most loyal viewers.
- Min. Amount to Share—the minimum tip amount required to submit a media request
- Max Duration—the maximum length of a video or song
- Buffer Time—the amount of time between videos
- Spam Security—this cross-references YouTube's video rating to filter by the quality and view count. Generally speaking, the higher the rating and view count, the less likely it is to violate Twitch's ToS.
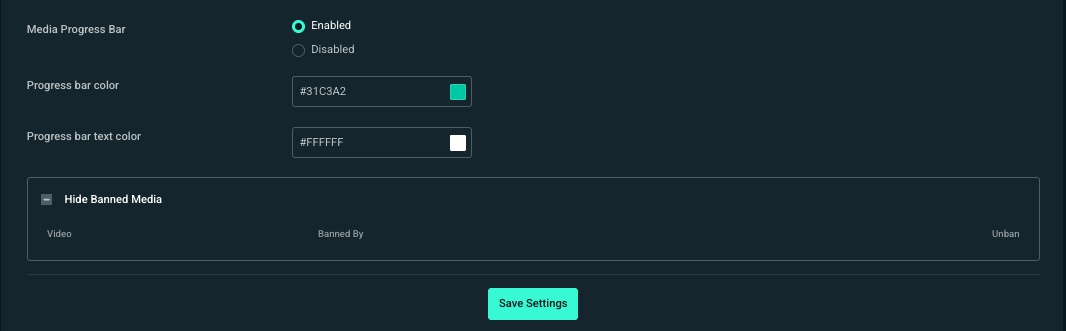
- Media Progress Bar—enable or disable the interface element for playback plus assign colors to the bar and text
-
Show/hide banned media-—expand to view which pieces of media you have banned in the past. You can remove a ban here if you choose.
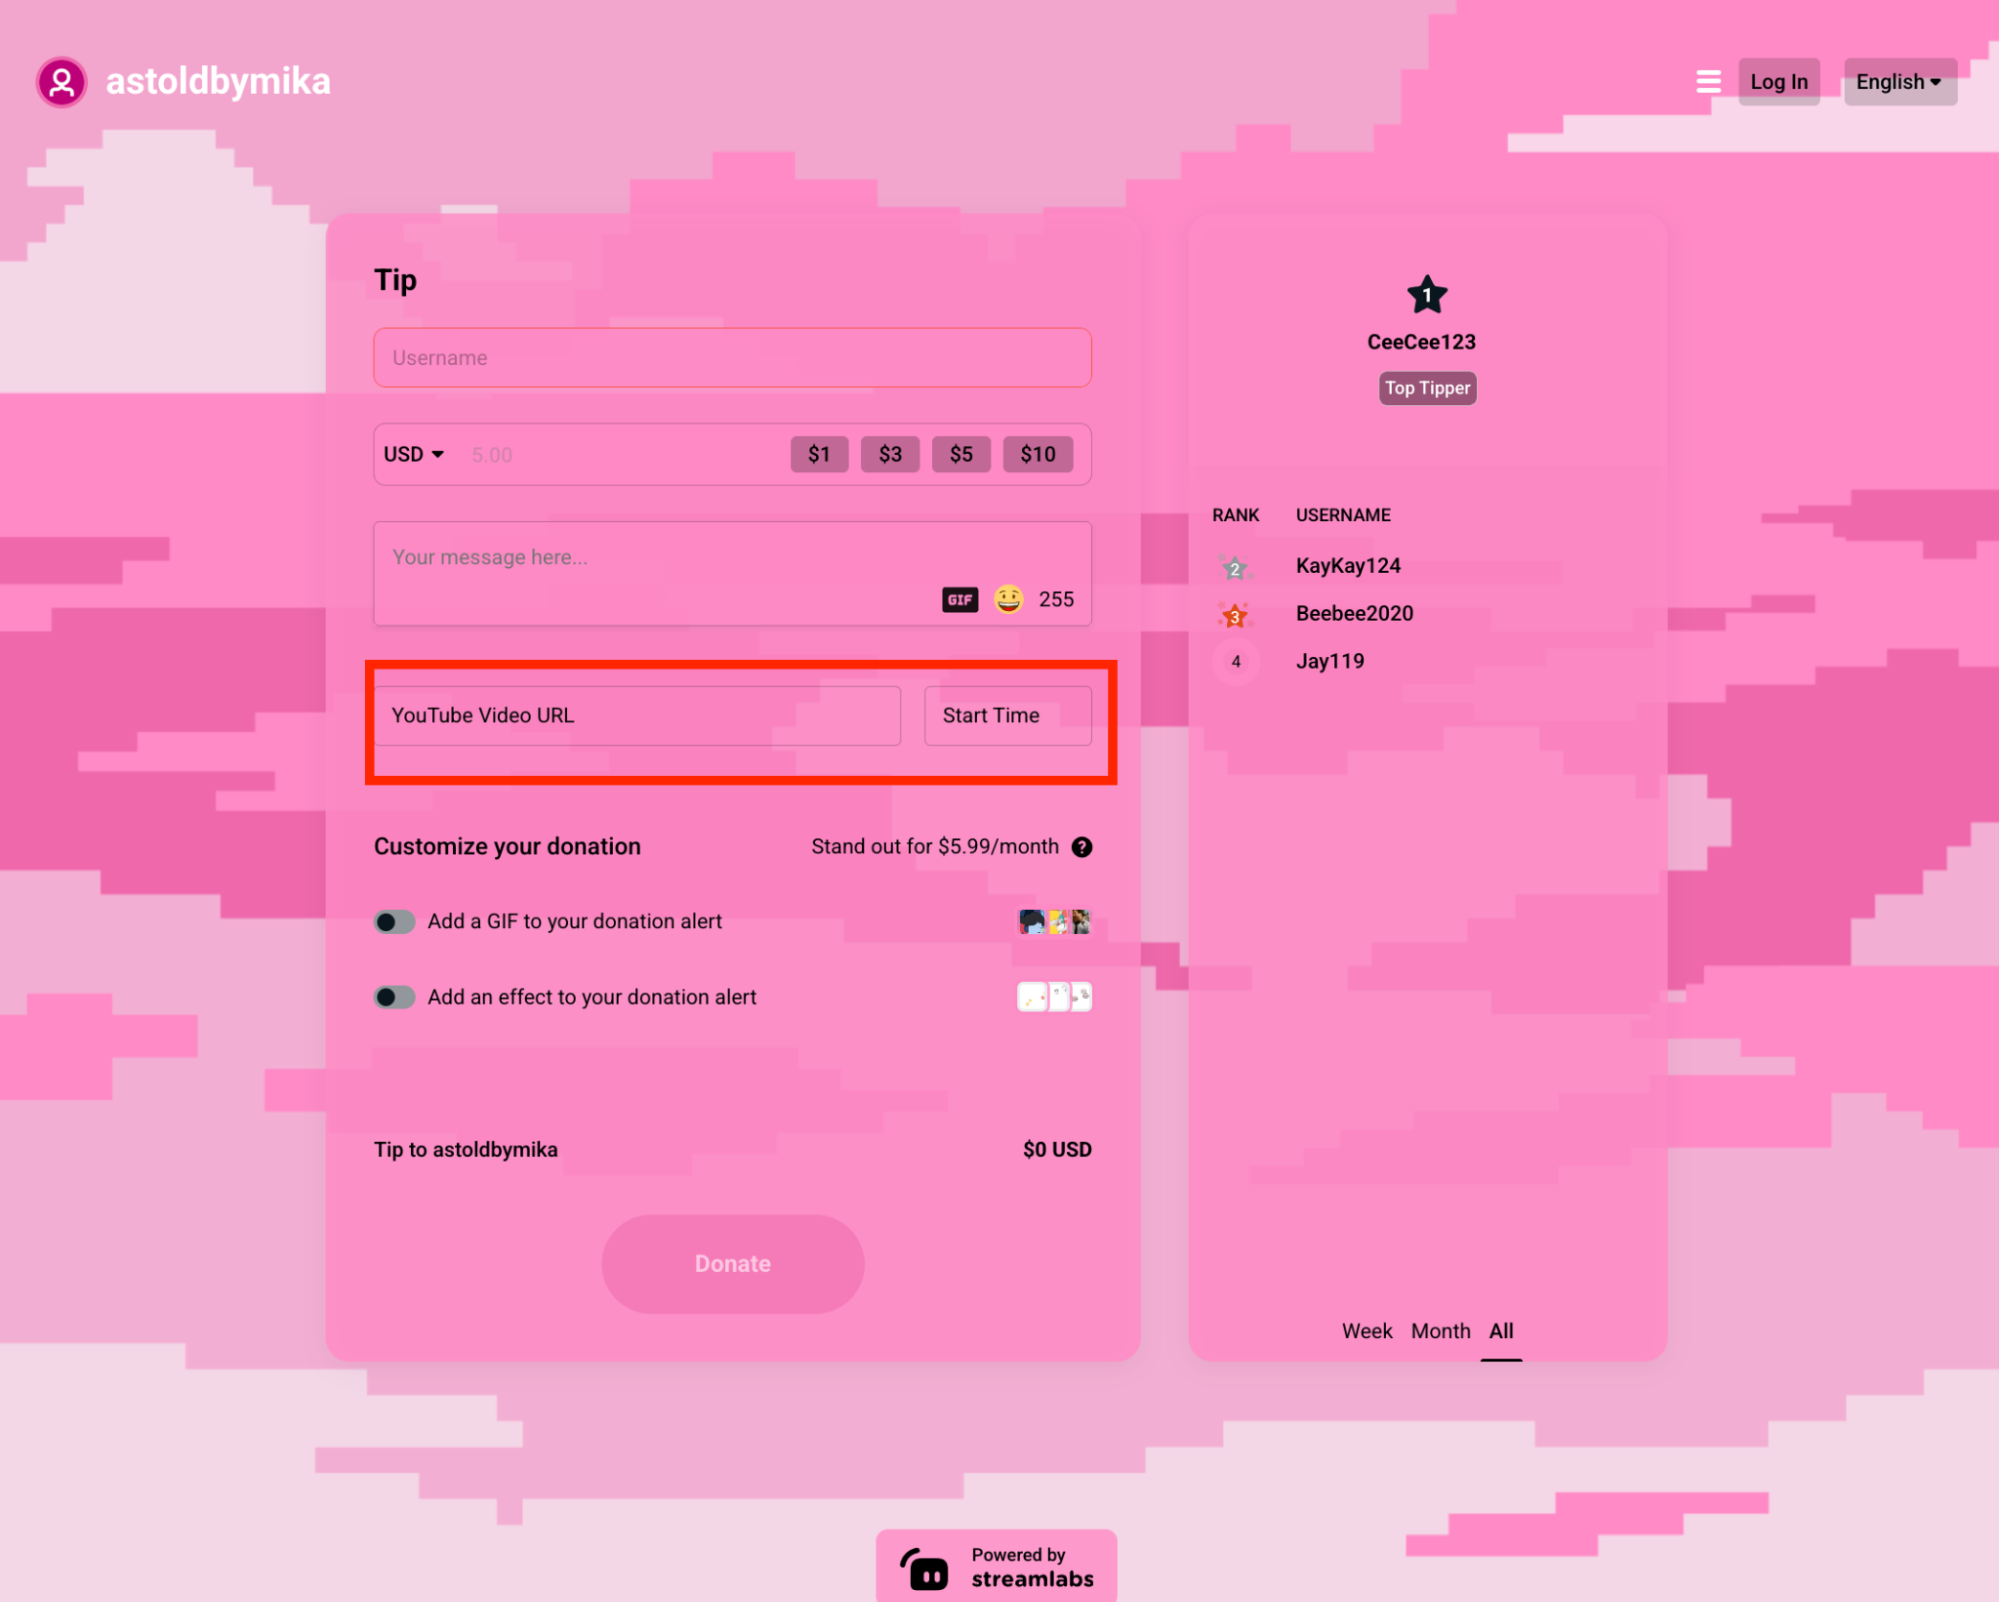
After you enable Media Share from your Streamlabs Dashboard settings, a new option to add a YouTube video and the start time of the clip will appear on your tip page.
How to Add Media Share via Cloudbot
Enabling Media Share via Cloudbot allows your viewers to request videos without sending a tip. It's a great way to encourage everyone to participate in your stream. You can toggle this setting on only for streams you want to watch viewer videos for or keep it on all the time.
Step 1: If you already have Cloudbot enabled and modded on your stream, you can skip to step 3. Otherwise, enable Cloudbot by navigating to the Cloudbot Dashboard on Streamlabs.com and toggle the Activate Cloudbot switch on.
Step 2: Head to your Twitch channel and mod Streamlabs by typing /mod Streamlabs in the chat.
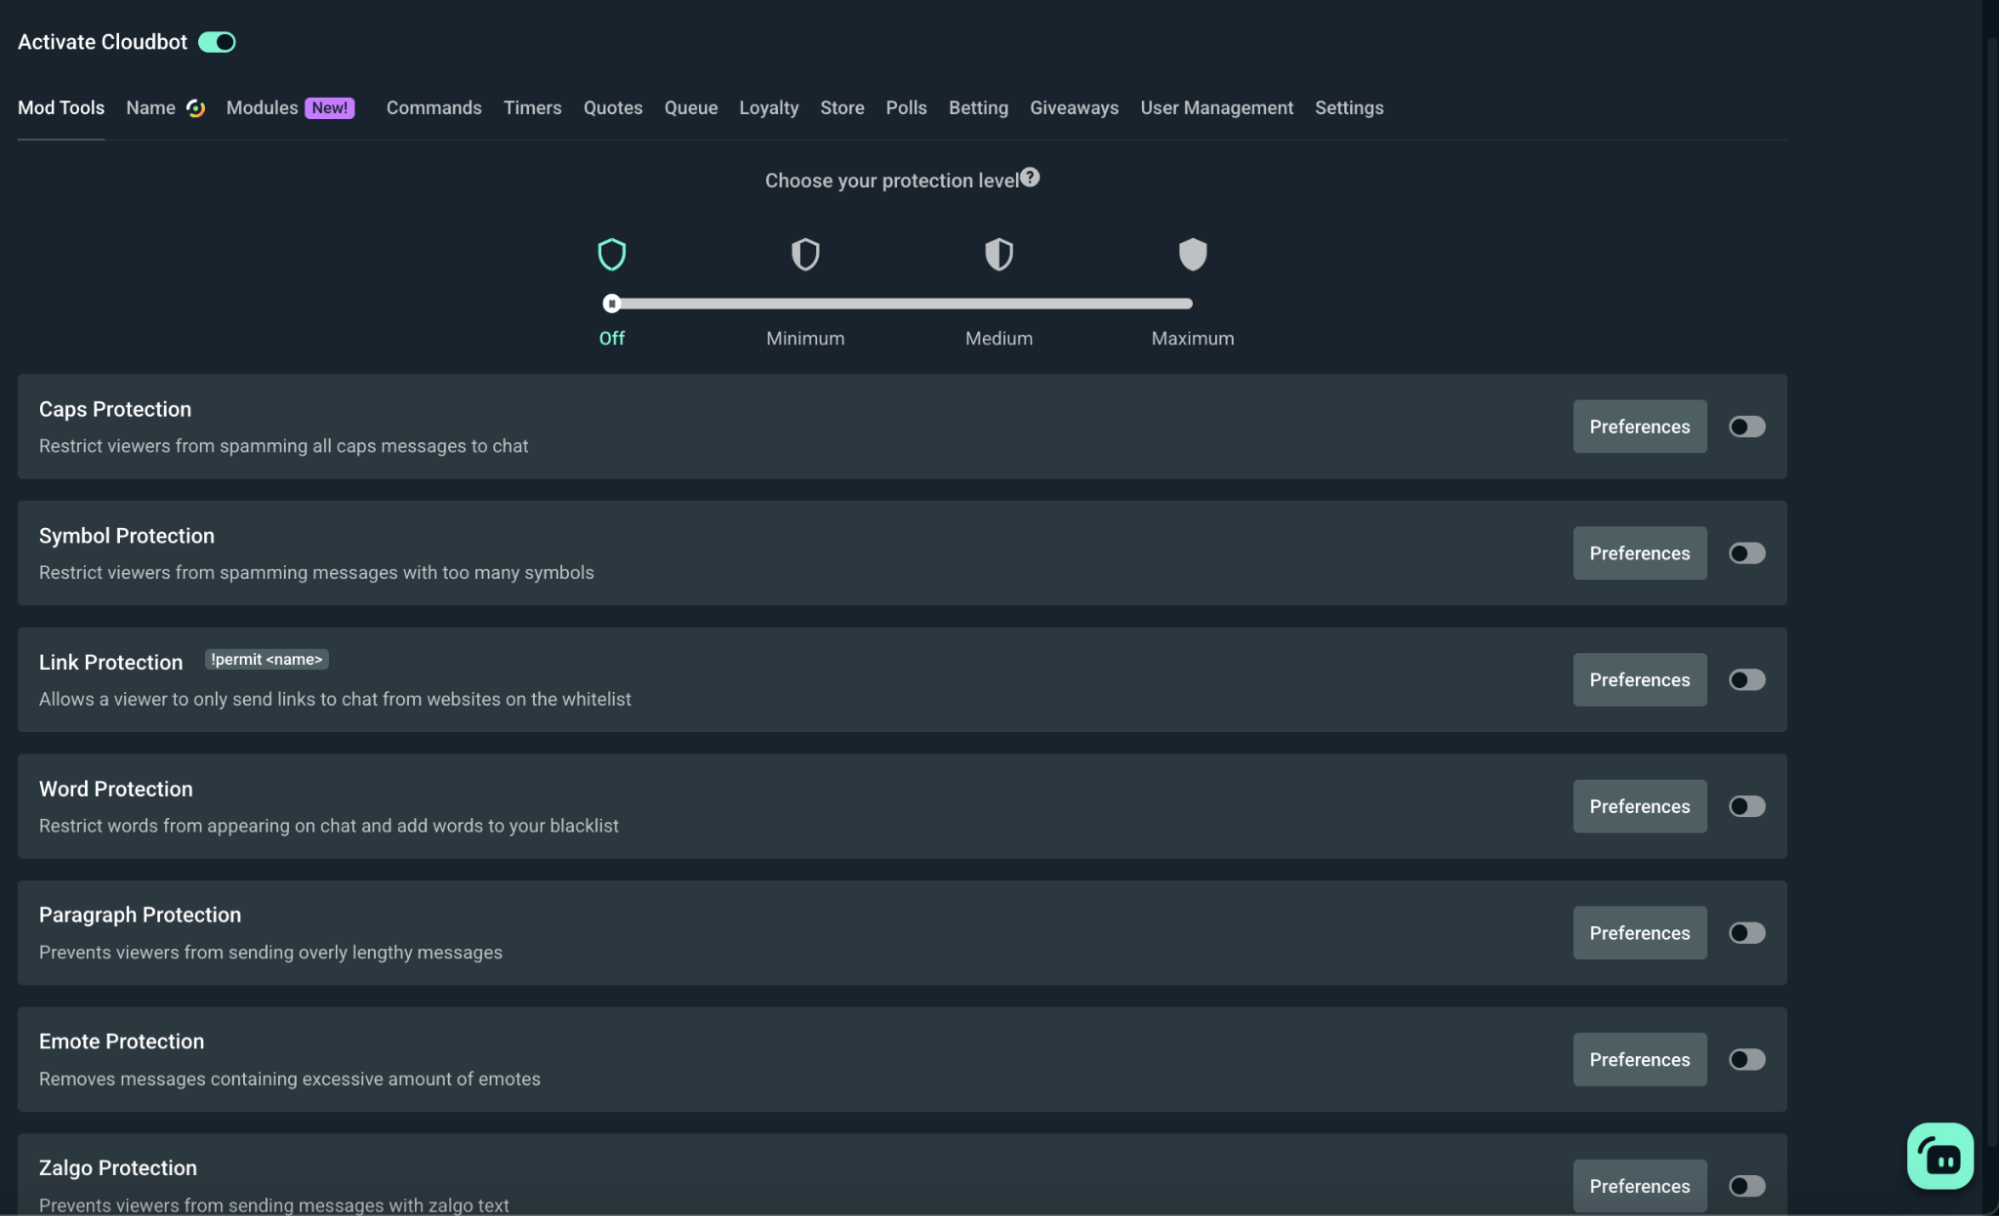
Step 3: Visit the Modules section in the Cloudbot Dashboard and toggle Media Share on.

Step 4: Click on the Preferences button next to the toggle to customize your Cloudbot Media Share settings.
- Choose your protection level: This allows you to adjust how strict we are in regards to media requests. Adjust this to your liking and we will automatically filter out potentially risky media that doesn't meet the requirements.
- Queue Limit: This is the maximum amount of videos that can be placed in the queue.
- Max Duration: This is the maximum video duration, any videos requested that are longer than this will be declined.
- Max Requests per User: This refers to the maximum amount of videos a user can have in the queue at one time.
- Votes Required to Skip: This refers to the number of users that need to use the !skip command before a video is skipped.
- Limit Requests to Music Only: If this is enabled, only videos classified as music on YouTube will be accepted, anything from another category will be declined.
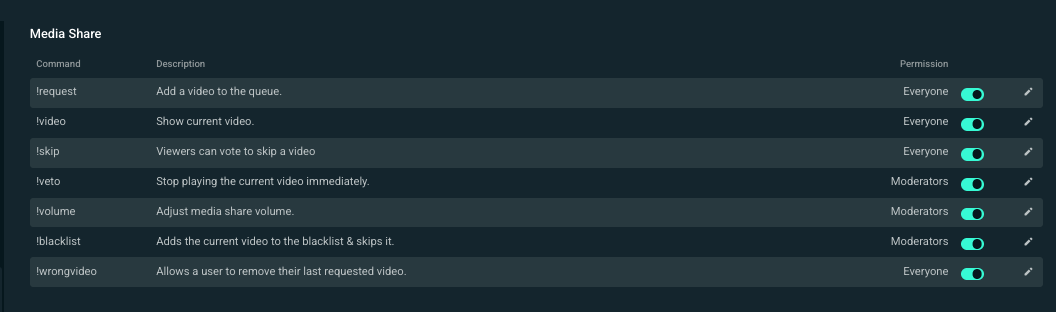
Step 5: From the Cloudbot dashboard, click Commands, then Default and scroll down to the media share section. Here you can view the default commands. You can change the commands and set custom responses by clicking the pencil icon next to a command.
Pro-Tip: Be sure to read the full list of Media Share commands to get a better idea of the best ways for you to utilize this tool with Cloudbot.
How to Manage Your Media
When media sharing requests come in, you can find the queue in your Dashboard under the Recent Events tab.
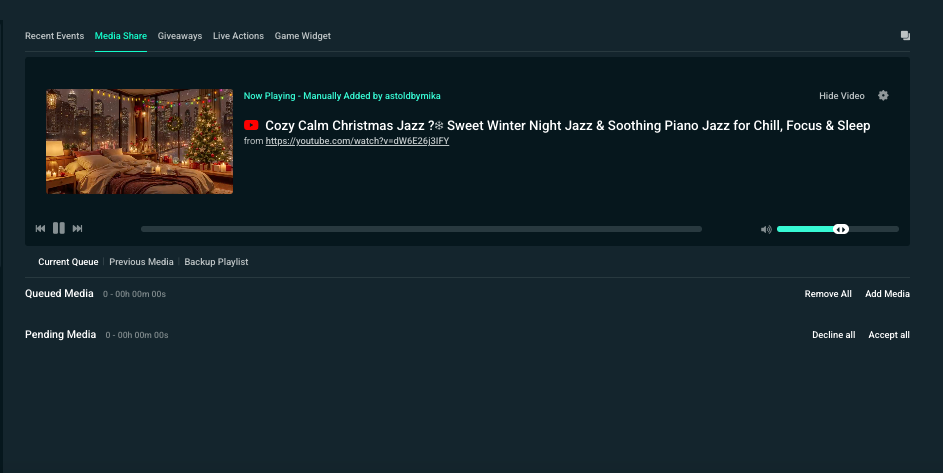
Click on Media Share from the options at the top. All of the videos your viewers sent are in the Pending Media section.
Click on the green checkmark to add them to your queued media. You can also queue media of your own by clicking Add Media.
Pending media is where videos will first appear when a tip or Cloudbot request is received. Reviewing videos is an excellent task for a moderator to handle when you're focused on your stream. Keep reading below to learn how to add specific permissions for your moderators.
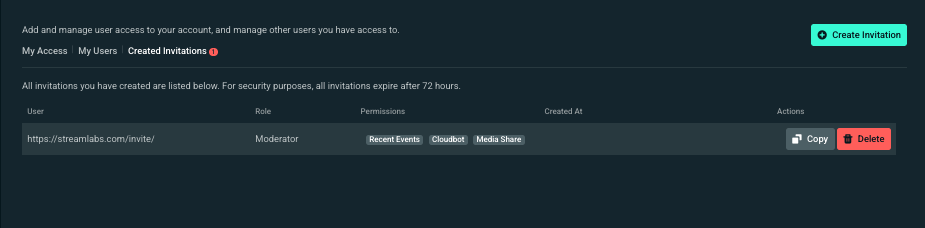
Granting Permissions to Moderators via Shared Access
You can make a trusted person a moderator or administrator by going to Account Settings > Shared Access > Created Invitations and clicking Create Invitation. Make sure you Media Share is checked under the access options. Ensure everybody you invite is someone you know and trust to manage your stream with you.
You can read more about Shared Access in our guide.
Add Media Share Widget to Streamlabs Desktop:
Adding shared media to your Streamlabs Desktop stream is a snap.
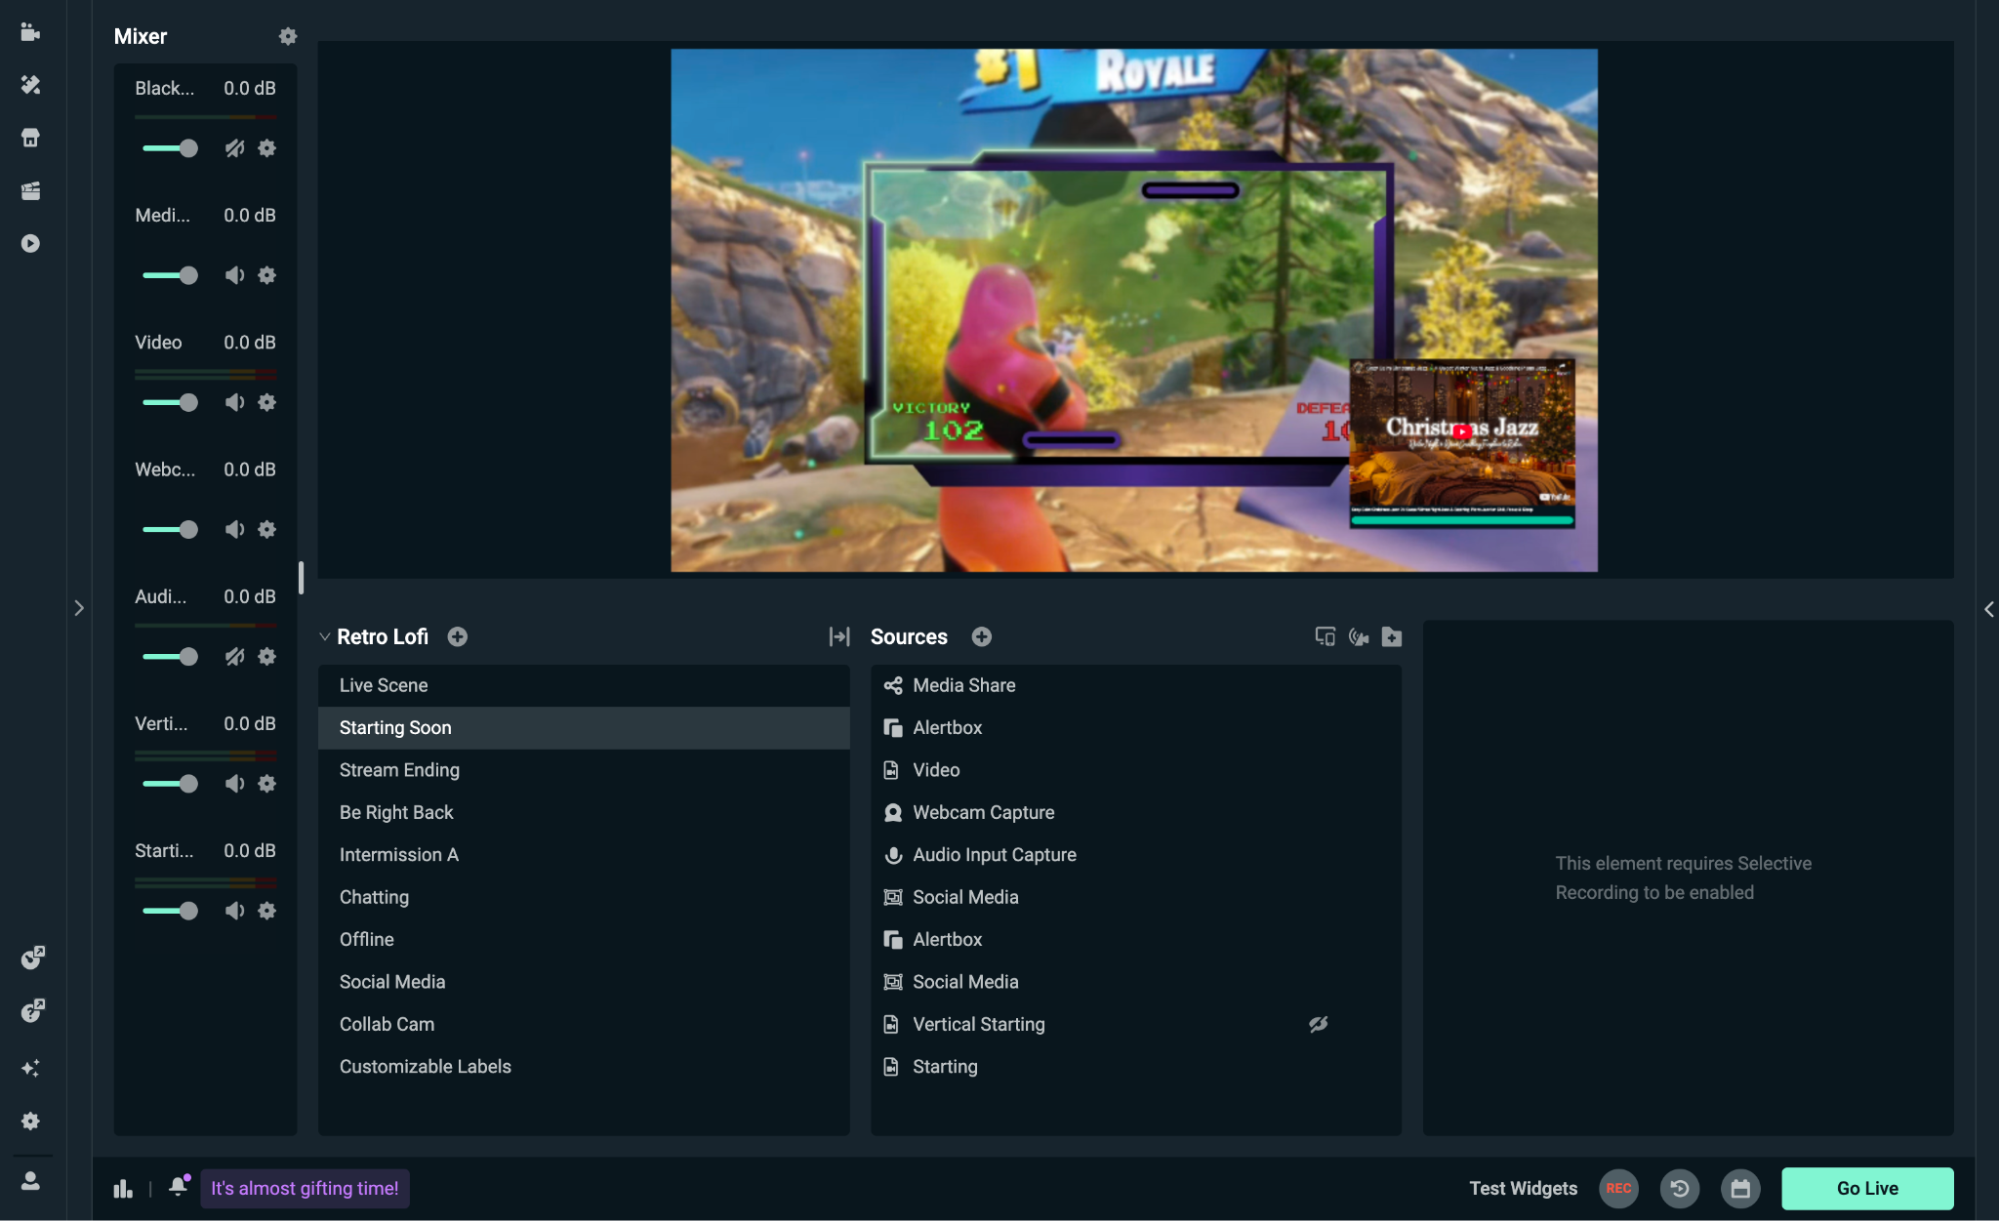
Step 1: Open Streamlabs Desktop on your computer.
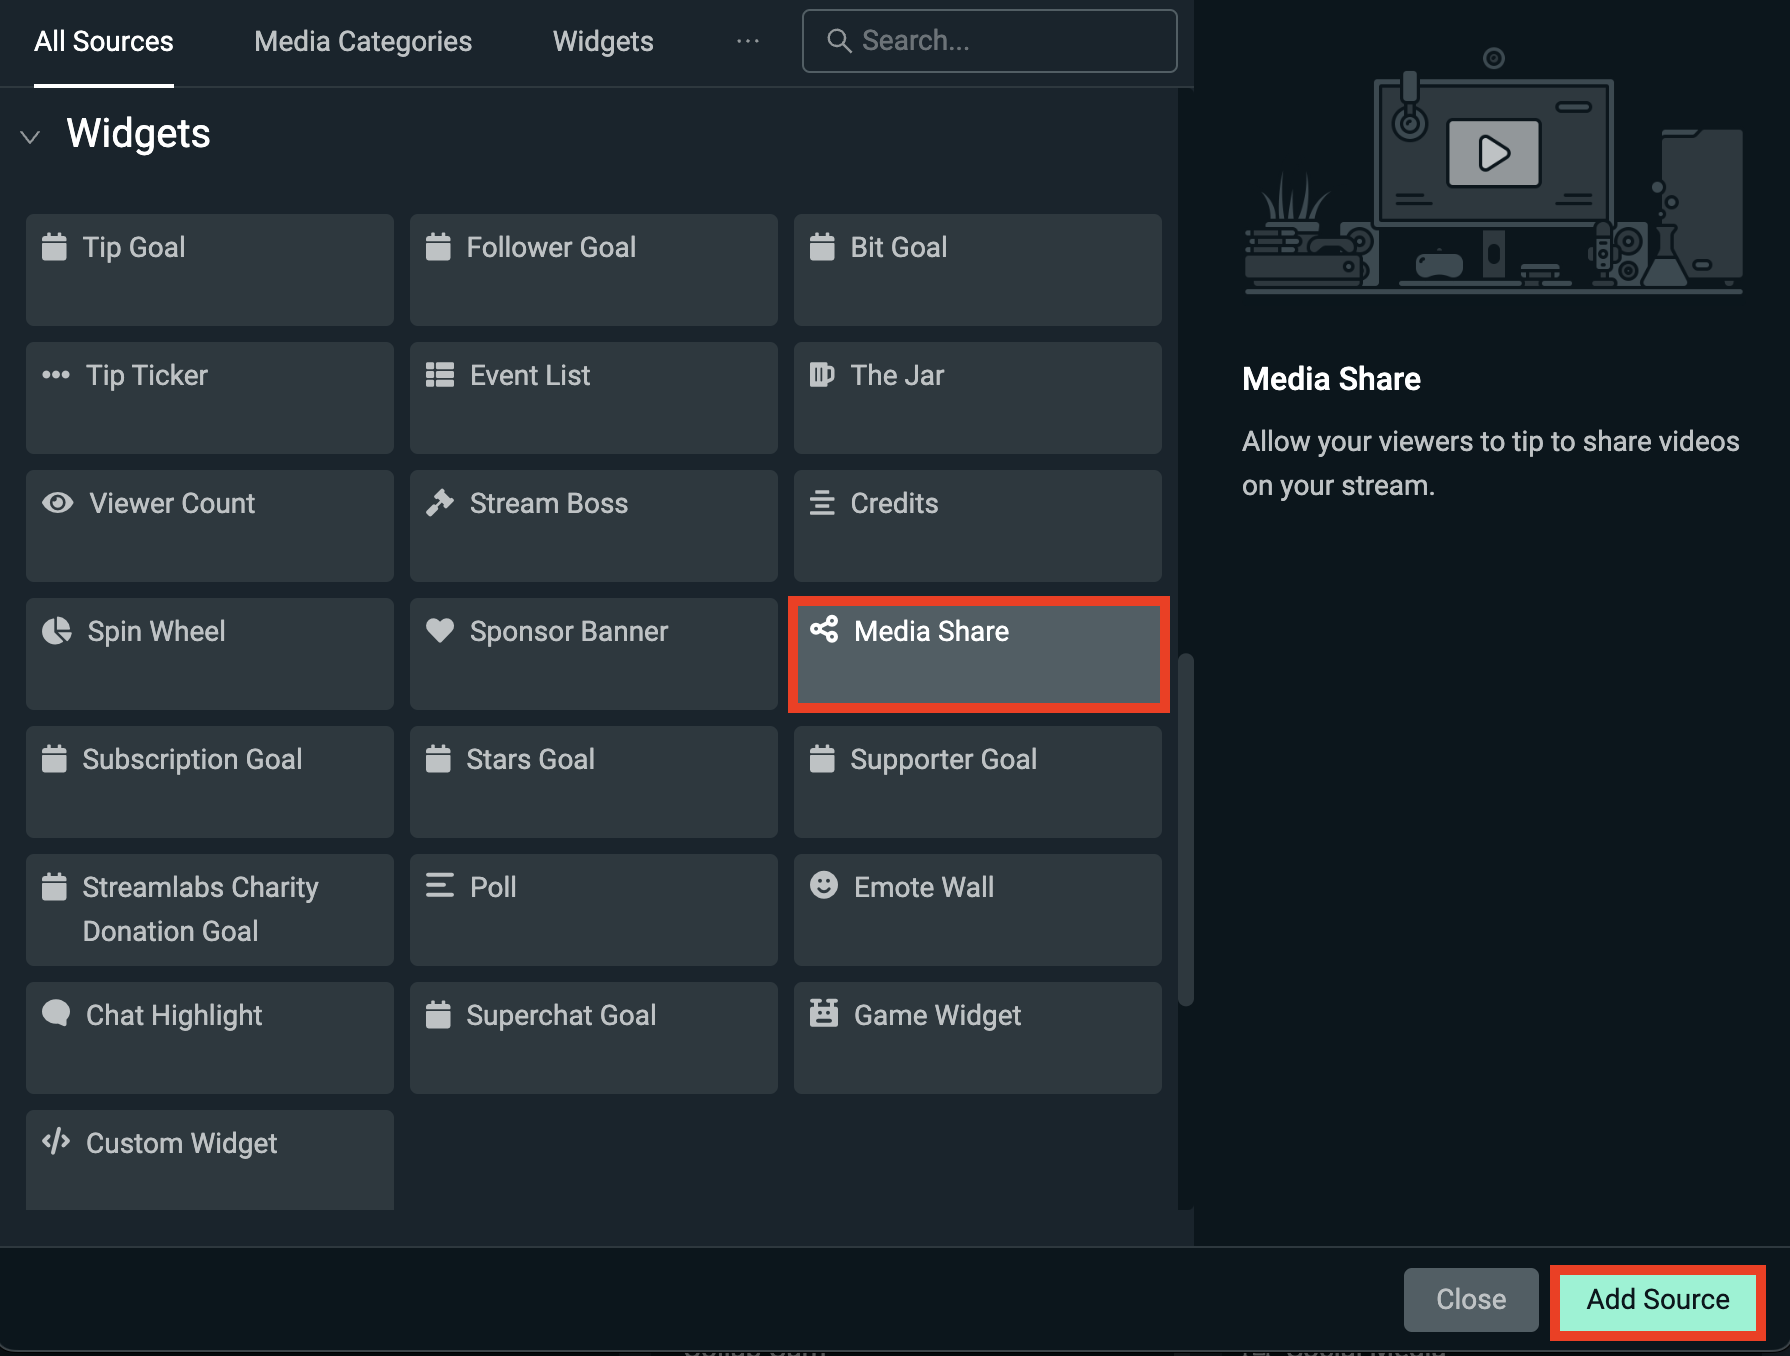
Step 2: In the Sources sections, click the + sign.
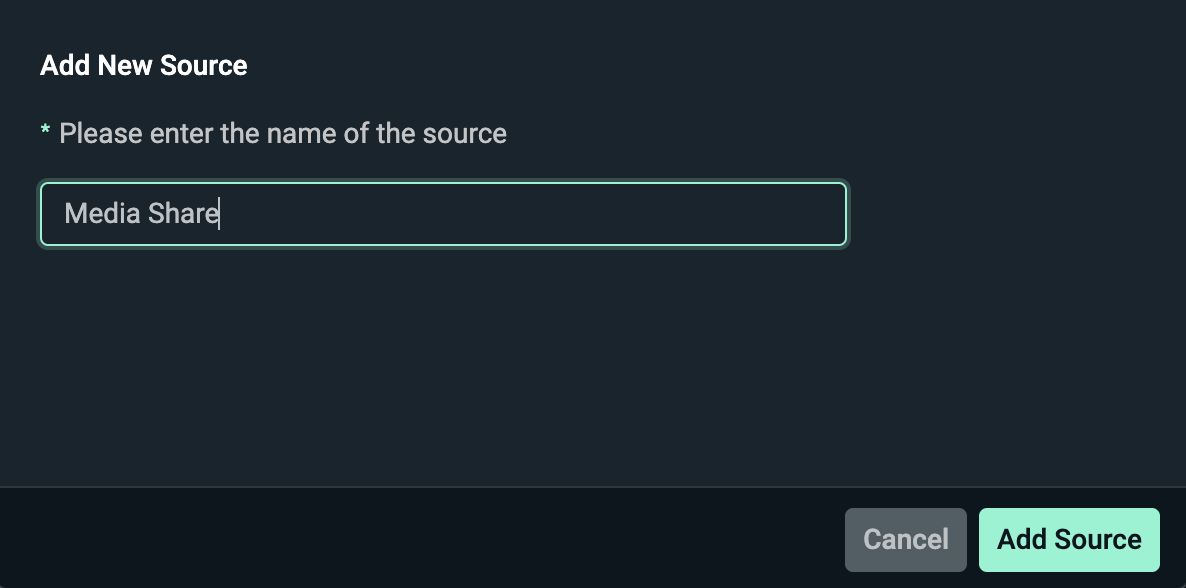
Step 3: Click the Media Share widget, Add Source and name your source.
Step 4: Adjust any settings before adding your widget to your stream.
Step 5: Click Done. Your Media Share widget will now show on stream and you can adjust the sizing and placement before going live.
How to Add Media Share in OBS Studio, XSplit, or Other Streaming Software
If you're using different software to stream like OBS Studio, XSplit, or something similar, you will need to copy and paste the widget URL (from your Streamlabs Dashboard) into your scene as a browser source. Below is an example using OBS Studio.
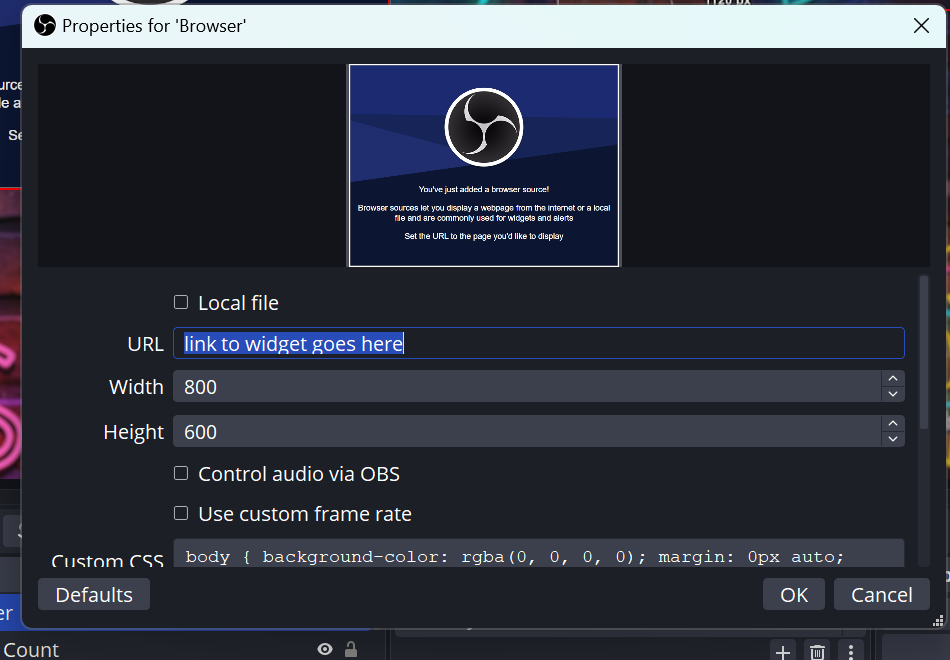
Step 1: Head to your Media Share settings on your Streamlabs.com Dashboard and copy the unique widget URL at the top of the page.
Step 2: Open OBS Studio, XSplit, or your preferred streaming software and add a Browser Source by clicking the + button in the Source panel, then select Browser Source (or the equivalent).
Note: If you don't see a Browser Source option in OBS, you may need to reinstall with the Full Installer available here as not all distros include it.
Step 3: Paste your Media Share widget URL into the URL field, set your desired width and height, then click OK. Resize and place the browser source in your canvas. Your Media Share will now display during your stream.
Note: To make changes to your Media Share outside of Streamlabs Desktop you must use your Streamlabs web dashboard.
You're all set with advanced media sharing! Now you're ready to laugh, cry, and cringe along with your viewers to whatever clips they want to share with you.
If you have any questions or comments, please let us know by contacting us or joining our Discord server.
0 Comments